sources
 Subscribe
 OPML
OPMLPowered by Perlanet
A question came up recently in the Perl community asking whether, in a Mojolicious application, it’s better to use DBIx::Class or a Mojolicious-specific module like Mojo::Pg.
It’s an interesting question, but I think it’s asking the wrong thing.
I’ve spent almost forty years moving up the stack of database abstractions. Every few years, someone invents a new layer, and every few years, experienced programmers explain that they don’t need it because they’re perfectly capable of working at the layer below. I’ve watched exactly the same argument play out over CGI, web frameworks, ORMs, containers and now AI-assisted coding.
Sometimes the new abstraction turns out to be a dead end. More often, it’s simply another step that lets us spend less time on plumbing and more time solving the problems our users actually care about.
I think that’s what’s really going on here.
You’re comparing different layers
The first thing that struck me about the discussion was that it jumped straight from DBIx::Class to Mojo::Pg, as though they were equivalent choices. I don’t think they are.
If you zoom out a little, there are several layers involved in database access:
- Application
- DBIx::Class / DBIO (ORM)
- DBI
- DBD::Pg / DBD::SQLite / DBD::MariaDB
- Database
Each layer builds on the one below it. DBIx::Class sits on top of DBI, DBI sits on top of a database driver, and the driver talks to the database itself. Every layer gives you a slightly richer abstraction whilst hiding a little more of the mechanics.
Mojo::Pg occupies a rather different place. It’s a PostgreSQL library designed specifically for Mojolicious. That’s a perfectly sensible design if you’ve already decided you’re using both PostgreSQL and Mojolicious, but it couples together decisions that I’d normally prefer to keep separate.
Personally, I like choosing my web framework independently of my database, and my database independently of my data access layer. The more independent those decisions are, the easier it is to change one without affecting the others.
Why I moved up the stack
I started writing embedded SQL in C in the late 1980s. When I moved to Perl in 1996, I used Sybperl, which was a thin layer over the proprietary Sybase database API. When I discovered DBI, I adopted it enthusiastically because it removed an enormous amount of repetitive code whilst remaining database-independent. Later, when DBIx::Class became mature enough for production systems, I happily moved another level up the stack.
None of those decisions happened because I couldn’t write SQL. I’ve been writing SQL since 1988 and I’m perfectly happy doing so.
The point was that I no longer wanted to spend my time writing the same joins, the same foreign key lookups and the same bits of boilerplate over and over again. Those aren’t the interesting parts of my applications. They’re necessary, but they’re plumbing. Good abstractions let me write that plumbing once and then think about the domain I’m modelling instead.
This isn’t just about databases
A few weeks ago, I wrote about The Long Road from CGI to Containers. The point of that article was that the history of web development is largely the history of building better abstractions.
We moved from CGI scripts to web frameworks. From hand-written deployment procedures to containers. Every step let us express our intent at a higher level whilst worrying less about the implementation details.
Database programming has followed exactly the same path.
But I like writing SQL
Whenever I recommend an ORM, someone inevitably assumes it’s because I don’t know SQL.
Nothing could be further from the truth.
SQL is probably the programming language I’ve been writing the longest. I enjoy writing SQL. But I don’t enjoy writing the same SQL repeatedly.
I don’t want every controller containing another join between the same tables. I don’t want to duplicate the same WHERE clause in half a dozen places. I don’t want to remember every foreign key relationship every time I touch the code.
Those things aren’t business logic; they’re plumbing.
An ORM lets me move that plumbing into one place and give it names.
What DBIx::Class gives me
For me, the biggest advantage of DBIx::Class isn’t that it generates SQL.
It’s that it models my application.
- A Person has many Titles.
- A Title belongs to a Person.
- A User> has many Orders.
Those relationships become part of the vocabulary of the application. Queries become reusable methods. Business rules become object methods instead of comments beside SQL statements.
Instead of thinking about joins, I’m thinking about people, titles and orders.
That’s a much nicer level of abstraction.
Isn’t it slower?
One criticism often levelled at DBIx::Class is performance.
That’s not entirely unfair. It’s perfectly possible to write inefficient DBIx::Class code. I know because I’ve done it.
While recently carrying out some optimisation on my Line of Succession application, I discovered one page was generating hundreds of unnecessary database queries. The solution wasn’t to abandon DBIx::Class and replace it with hand-written SQL. The solution was to understand the ORM better.
Adding a couple of well-placed prefetch clauses reduced the number of queries dramatically with almost no change to the surrounding code.
The ORM wasn’t the problem; my use of the ORM was.
That’s a useful lesson. Every abstraction has a learning curve. If you don’t understand how it’s working underneath, you’ll eventually hit performance problems. But once you do understand it, you can often achieve dramatic improvements without sacrificing the higher-level API that made you choose the abstraction in the first place.
What if I just want to write SQL?
One thing that struck me about the original discussion is that it jumped straight from DBIx::Class to Mojo::Pg, as though those were the only two choices.
I don’t think they are.
If all I wanted was to execute SQL from a Mojolicious application, I’d probably start by looking for a DBI-based solution rather than one that’s tied specifically to PostgreSQL. Something like Mojolicious::Plugin::Database seems like a more natural fit, as it lets me use the standard Perl database abstraction whilst integrating cleanly with Mojolicious.
That still leaves me free to choose PostgreSQL, SQLite, MariaDB or whatever other database makes sense for the project.
By contrast, choosing Mojo::Pg bakes the decision to use PostgreSQL into your application at a deeper level than I’d be comfortable with.
Good abstractions should reduce coupling, not increase it.
The model layer
Of course, in larger applications, there’s usually another abstraction on top of the ORM itself. My controllers don’t generally talk directly to DBIx::Class resultsets; they ask domain-level questions such as “Who was sovereign on this date?” The fact that the answer currently comes from DBIx::Class is an implementation detail. That’s another useful abstraction—but it’s probably a topic for another article.
Aside: What happened to DBIx::Class?
For a long time, this was the awkward question.
Around a decade ago, active development effectively stopped. This wasn’t because the technology had failed or because the community lost interest. The maintainer had explicitly stopped development, and measures such as the CPAN NOXFER co-maintainer flag prevented the normal open source succession process from happening.
For years, that left DBIx::Class in an uncomfortable position. It remained stable and widely used, but there was understandable uncertainty about its long-term future.
Fortunately, that situation finally appears to be changing. DBIO appeared on CPAN just a few days ago. It has taken the hard-fork route, preserving the ideas that made DBIx::Class successful whilst allowing active development to resume.
Whether DBIO ultimately becomes the successor to DBIx::Class isn’t really the important point.
The important point is that these ideas are still valuable enough that people are prepared to invest significant effort in carrying them forward.
Choosing your abstraction
I don’t think this is fundamentally a question about Mojolicious.
I’d happily use DBIx::Class with Mojolicious, Dancer2 or any other web framework. I’d happily use DBI with all of them too. The web framework and the data access layer are largely independent architectural decisions, and I generally prefer to keep them that way.
The important decision isn’t the framework.
It isn’t even the database.
It’s deciding where you want your application to live.
Do you want to think in terms of SQL?
Do you want to think in terms of tables?
Or do you want to think in terms of the concepts that make up your application’s domain?
After nearly forty years of writing SQL, I know which one I’d rather spend my day thinking about.
The best abstraction isn’t the one that hides the most detail.
It’s the one that lets you spend most of your time thinking about the problem you’re actually trying to solve.
Further reading
I’ve written about different aspects of this topic before:
- DBIx::Class vs DBI (2012) — why I prefer to use an ORM over raw SQL.
- The Joy of Prefetch (2015) — how understanding your ORM can transform performance.
- The Long Road from CGI to Containers (2026) — why software engineering is really the story of building better abstractions.
The post Choosing the Right Database Abstraction first appeared on Perl Hacks.
-
56ed3b5🟩 Line of Succession is up (200 in 377 ms) [skip ci] [upptime]
-
37754f3🟩 Dave Cross is up (200 in 158 ms) [skip ci] [upptime]
- 10 more commits »

Watched on Friday June 26, 2026.

Watched on Friday June 26, 2026.

Watched on Thursday June 25, 2026.

[I really don’t consider myself a political pundit, but a few (ok, two) people have asked for my opinion on this, so I thought it was…
[I really don’t consider myself a political pundit, but a few (ok, two) people have asked for my opinion on this, so I thought it was worth writing something.]
Keir Starmer may be the first British Prime Minister to resign because he was better at governing than he was at politics.
When Keir Starmer resigned as Prime Minister, reactions tended to fall into two camps.
His supporters argued that he had inherited a mess, stabilised the country and delivered meaningful reforms in difficult circumstances. His critics claimed he had squandered a huge electoral mandate, failed to inspire the public and left voters disappointed.
Both sides have a point.
The problem with much of the discussion is that it often starts from the assumption that Starmer’s resignation must have been the result of failure. Yet when we look at his record, the picture is more complicated. He was neither the transformative success his supporters hoped for nor the disastrous failure his opponents portrayed.
Instead, he may have become the latest example of a modern political truth: governing successfully and remaining politically popular are not the same thing.
A Government That Never Quite Found Its Purpose
The most obvious criticism of Starmer’s premiership is that many voters never became entirely sure what it stood for.
Labour won a huge parliamentary majority in 2024, but much of that victory was driven by exhaustion with the Conservatives rather than enthusiasm for Starmer himself.
As Prime Minister, he often seemed more focused on solving problems than articulating a broader vision for the country.
That approach has advantages. It avoids ideological grandstanding and allows governments to focus on practical outcomes. But it also leaves a vacuum. Voters generally want to know not only what a government is doing but why it is doing it and where it intends to take the country.
Too often, Starmer’s government appeared managerial rather than inspirational.
This perception was reinforced by a series of political missteps. The gifts and hospitality controversy—quickly labelled “suit-gate” by opponents—created an impression of poor judgement. The rehabilitation of Peter Mandelson was particularly puzzling. Whatever one thinks of Mandelson’s abilities, he remains associated in many voters’ minds with an earlier era of Labour politics. At a time when Starmer was trying to present his government as a fresh start, bringing back one of New Labour’s most controversial figures felt politically maladroit.
One of Starmer’s recurring weaknesses was an apparent inability to anticipate how perfectly reasonable administrative decisions would be perceived politically. Again and again, his government found itself defending actions that may have made sense internally but looked tone-deaf or unnecessary to the wider public. At times the government seemed surprisingly poor at communicating its own achievements, creating distractions when it should have been shaping the political conversation.
Even some Labour supporters found themselves asking why a government that had things to boast about seemed reluctant or unable to boast about them.
Yet the Record Was Better Than Many Admit
The strange thing is that the government’s record was often stronger than its popularity suggested.
Labour inherited a country facing serious challenges. Public services were under strain. Economic growth had been weak for years. Political trust was low after a period that included Boris Johnson, Liz Truss and Rishi Sunak.
No government could have solved all of those problems quickly.
Nevertheless, Starmer’s administration could point to a number of significant achievements.
Inflation returned to more normal levels after the cost-of-living crisis.
Political stability returned to Westminster after years of turmoil.
Relations with European partners improved, reducing some of the friction that had characterised the immediate post-Brexit years.
The government pushed through planning reforms designed to increase housebuilding and tackle Britain’s chronic housing shortage.
Workers’ rights were strengthened through reforms aimed at improving employment protections and addressing some of the more precarious aspects of modern employment.
Immigration, which had reached record levels under the Conservatives, fell significantly.
Reasonable people can debate how much credit Starmer deserves for each of these developments. But it is difficult to argue that nothing was achieved.
The more interesting question is why those achievements failed to translate into greater political support.
The Weight of Problems Decades in the Making
Part of the answer lies in the scale of the problems Labour inherited.
Britain’s housing shortage was not created in a single Parliament.
The NHS backlog was not the product of a single government.
Low productivity growth had been troubling economists since the financial crisis of 2008.
Public finances were constrained by high levels of debt and growing demands on public services.
An ageing population continued to increase pressure on health and social care budgets.
These are structural problems that no Prime Minister can solve in a few years.
Starmer often found himself in the politically awkward position of making progress without producing transformation.
The public, understandably, wanted transformation.
The Brexit Constraint
Brexit also formed part of the backdrop.
Whether one believes Brexit was the right decision or the wrong one, it is difficult to deny that it reshaped Britain’s economic environment.
Trade frictions increased. Some businesses faced additional barriers. Economic integration with Britain’s largest market became more complicated.
At the same time, revisiting the fundamental Brexit settlement had become politically impossible.
Starmer therefore found himself trying to improve economic performance while ruling out major changes to Britain’s relationship with the European Union.
That may have been politically necessary. But it also limited the range of options available to his government.
Governing in an Unstable World
Nor was Britain operating in a vacuum.
The war in Ukraine continued to affect European security and economic confidence.
Conflict in the Middle East created diplomatic challenges and domestic political tensions.
Global supply chains remained vulnerable to disruption.
The return of Donald Trump to the White House added uncertainty to international trade and security arrangements.
None of these developments were under Starmer’s control, but all influenced the environment in which he governed.
Prime Ministers are often judged as though they are responsible for everything that happens during their time in office. In reality, they spend much of their time responding to events they neither created nor wanted.
The Successes People Didn’t Feel
Perhaps the most important explanation is also the simplest.
Many of the government’s successes were real, but they were not necessarily visible.
A planning reform does not immediately make housing affordable.
A workers’ rights reform does not instantly change someone’s standard of living.
Improved relations with European governments rarely dominate conversations in pubs, cafés or workplaces.
Meanwhile, many voters continued to face high housing costs, stretched public services and economic insecurity.
When people feel anxious about their future, they are unlikely to reward governments for improvements that seem abstract or distant.
Politics is experienced emotionally, not statistically.
A government can improve economic indicators while voters continue to feel dissatisfied.
The Media Problem
Starmer also governed in a media environment that would have been almost unrecognisable to earlier Prime Ministers.
Sections of the traditional press remained hostile to Labour.
At the same time, social media increasingly rewarded outrage, certainty and emotional appeal over nuance.
Political narratives can now spread globally within hours, amplified by influencers, political campaigners, billionaires, foreign actors and automated accounts.
In such an environment, facts often struggle to compete with stories.
A successful policy may receive less attention than a ministerial gaffe. A complicated achievement may be overwhelmed by a simple slogan.
This is not a problem unique to Starmer, but it undoubtedly affected his government.
The Rise of Politics as Performance
Ultimately, Starmer may have fallen victim to a broader change in democratic politics.
Voters frequently say they want competence, seriousness and honesty.
Yet modern political culture often rewards different qualities.
Charisma matters.
Narrative matters.
Identity matters.
The ability to dominate a news cycle matters.
Starmer’s strengths lay elsewhere. He was a manager, a lawyer and a problem-solver.
Those qualities may help someone govern effectively. They do not necessarily help them win popularity contests.
The irony is that some of the characteristics that made Starmer an effective administrator may have made him a less successful politician.
The contrast with Nigel Farage is instructive. Whatever one thinks of his politics, Farage’s appeal is rooted in clarity, simplicity and the perception that he says what he believes. Those qualities are amplified by modern media. Starmer’s strengths—caution, precision and attention to detail—are often invisible.
A Qualified Verdict
It would be wrong to portray Starmer as a victim of circumstance. He made mistakes. His government sometimes lacked a clear narrative. He often struggled to connect emotionally with voters. There were moments when he appeared politically clumsy.
But it would be equally wrong to portray his resignation as the inevitable consequence of failure.
The truth is more complicated.
He inherited deep structural problems, governed through a period of international instability, achieved more than many critics acknowledge and yet never persuaded enough people that those achievements mattered.
History has often been kinder to Prime Ministers than their contemporaries were.
Whether that will be true of Keir Starmer remains to be seen.
But if future historians conclude that he governed more successfully than he communicated, they may not be entirely wrong.
The post Why Did Keir Starmer Resign? appeared first on Davblog.

Watched on Friday June 19, 2026.

Watched on Thursday June 11, 2026.
Public Identifiers, UUIDs and a Tiny SEO Fix
A recent question from my friend and colleague Mohammad got me thinking about the way we identify data in web applications.
While working on the DBIC component of a REST API, he came across the term enumeration attack. In this type of attack, an attacker systematically guesses resource identifiers in order to access data they shouldn’t be able to see.
For example, if your API exposes URLs like this:
GET /users/123
GET /users/124
GET /users/125
then it’s easy for someone to try a large range of identifiers and see what they get back.
Mohammad’s question was simple:
Should we replace sequential IDs with UUIDs? And if we do, should we index the UUID column?
As is often the case, the answer turned out to be “it depends”.
Two Different Types of Data
The first thing I realised is that not all data objects have the same requirements.
Some objects are naturally public.
For example, books on a publishing website are intended to be discovered. In fact, you probably want people to be able to guess their URLs:
/books/design-patterns-in-modern-perl
In this case, a human-readable slug makes perfect sense. Other objects are private by nature. User accounts, orders, invoices and API resources generally shouldn’t be enumerable. In those cases, a UUID is often a better choice:
/users/550e8400-e29b-41d4-a716-446655440000
The important observation is that slugs and UUIDs solve different problems.
- Slugs are for humans (and, perhaps, search engines).
- UUIDs are for machines.
Database Design
A common question is whether a UUID should replace the primary key.
In most cases, I don’t think it should.
My preferred design is:
CREATE TABLE users (
  id BIGINT PRIMARY KEY,
  uuid UUID NOT NULL UNIQUE
);
The integer primary key remains the internal identifier used for joins and foreign keys.
The UUID becomes the public identifier exposed through APIs.
This gives you the best of both worlds:
- Small, efficient foreign keys.
- Fast joins.
- Unguessable public identifiers.
If the application regularly searches by UUID then the UUID column should be indexed. In practice, declaring it UNIQUE will usually create the appropriate index automatically.
The Hybrid Approach
Thinking about this reminded me that many large sites use a hybrid approach.
Amazon product URLs contain both a human-readable title and a stable identifier:
/Design-Patterns-Modern-Perl/dp/B0XXXXX123
The ASIN is what really identifies the product.
The title is there for humans.
Stack Overflow does something similar:
/questions/12345/how-do-i-index-a-uuid-column
Again, the question ID is authoritative. The title is helpful context.
My Line of Succession website uses the same idea.
A person page looks like this:
/p/2b5998-the-prince-william-prince-of-wales
The important part is the identifier:
2b5998
The rest is descriptive text.
This turns out to be particularly useful for royalty because titles change constantly. Someone might be “Prince William”, then “The Prince of Wales”, and eventually “King William V”.
By separating identity from presentation, old links continue to work regardless of title changes.
A Tiny Bug
While thinking about all of this, I discovered a small bug in Line of Succession.
The site allows any descriptive text after the identifier. These URLs all resolve to the same person:
/p/2b5998-the-prince-william-prince-of-wales
/p/2b5998-prince-billy
/p/2b5998-fred
The application correctly ignores the descriptive text and uses only the identifier.
However, there was a problem.
The page was generating its canonical URL from the incoming request path rather than from the person record.
That meant a request for:
/p/2b5998-prince-billy
generated:
<link rel="canonical"
      href="https://lineofsuccession.co.uk/p/2b5998-prince-billy">
which is obviously not the canonical URL.
The fix was surprisingly small:
sub canonical( $self ) {
   if ($self->request->is_date_page) {
     return '/' . $self->canonical_date;
+  } elsif($self->request->is_person_page) {
+    return '/p/' . $self->request->person->slug;
   } else {
     return $self->request->path;
   }
 }
At the same time I simplified another method by making it reuse the canonical URL logic.
The result was a six-line patch that fixed the SEO issue and made the code slightly cleaner.
Those are my favourite kinds of fixes.
Future Improvements
The fix also revealed an emerging abstraction in the code.
At the moment, various parts of the application know how to construct URLs for different object types.
A cleaner approach would be to give objects responsibility for generating their own URLs.
I’m considering a HasURL role that would require an object to provide an identifier and optionally a prefix, and then build the URL automatically.
That’s a job for another day.
For now, a small question about UUIDs led to a useful discussion about public identifiers, a review of URL design, and a tiny production fix. Not bad for an afternoon’s work.
The post Public Identifiers, UUIDs and a Tiny SEO Fix first appeared on Perl Hacks.
One of the more interesting additions I’ve made recently to the Line of Succession website is support for the Model Context Protocol (MCP).
If you’ve spent any time around AI tooling recently, you’ve probably seen people talking about MCP. It’s often described as “USB for AI”, which is perhaps a little overblown, but the basic idea is sound. MCP provides a standard way for AI assistants to discover and use external tools and data sources.
In practical terms, it means that instead of building bespoke integrations for ChatGPT, Claude, Gemini and whatever comes next, you expose a standard MCP endpoint and let the AI clients do the rest.
For a data-driven site like Line of Succession, that seemed like an obvious experiment.
What is MCP?
The Model Context Protocol was originally developed by Anthropic and has rapidly become one of the emerging standards in the AI ecosystem.
An MCP server exposes:
- Information about itself
- A list of available tools
- Schemas describing how those tools should be called
- The results returned by those tools
An AI client can connect to the server, discover the available tools and invoke them when needed.
Instead of scraping web pages or attempting to infer information from HTML, the AI gets access to structured data.
That’s exactly the kind of thing Line of Succession is good at.
Why Add MCP?
The site already exposes information through a traditional web interface and a JSON API.
But those interfaces were designed for humans and developers respectively.
MCP gives AI systems a much cleaner integration point.
For example, an AI assistant can now answer questions like:
- Who was the British sovereign on 14 November 1948?
- What did the line of succession look like in 1980?
- Who was next in line when Queen Victoria died?
without having to scrape pages or understand the site’s internal URLs.
More importantly, it ensures that the information comes directly from the same database that powers the website.
The AI isn’t guessing.
It’s querying the source of truth.
As someone who runs a reference website, that’s a pretty attractive proposition.
The Initial Design
My first goal was to keep things simple.
Rather than exposing dozens of narrowly-focused tools, I started with just two:
sovereign_on_dateline_of_succession
Those two tools cover a surprisingly large proportion of the questions people are likely to ask.
The first returns the sovereign reigning on a given date. The second returns the line of succession for a specified date, with a configurable limit on the number of entries returned.
The implementation currently caps the list at thirty people. That’s enough for most use cases while preventing someone from accidentally asking for all six thousand people currently in the line of succession.
One thing I learned quite quickly is that MCP isn’t really about exposing huge amounts of data. It’s about exposing useful questions that can be answered from your data.
MCP Is Mostly JSON-RPC
One thing that surprised me when I first started reading the specification was how little protocol code is actually required.
At its core, MCP uses JSON-RPC.
A client sends requests like:
{
  "jsonrpc": "2.0",
  "id": 1,
  "method": "tools/list"
}
and the server responds with:
{
  "jsonrpc": "2.0",
  "id": 1,
  "result": {
    ...
  }
}
Once I’d written helper methods for creating standard JSON-RPC responses, most of the complexity disappeared.
The MCP module contains methods like:
sub rpc_result ($self, $id, $result)
and:
sub rpc_error ($self, $id, $code, $message)
which means the Dancer route handlers remain pleasantly small.
The protocol logic lives in one place and the web application simply delegates to it.
Separating the MCP Logic
I didn’t want protocol-specific code scattered throughout the web application.
Instead, I created a dedicated module:
package Succession::MCP;
This module is responsible for:
- Initialisation
- Tool discovery
- Tool execution
- JSON-RPC response generation
- Error handling
That keeps the Dancer routes thin and makes the MCP implementation easier to test independently.
It also means that if I ever decide to expose the same MCP server through a different transport mechanism, most of the work is already done.
Tool Calls Are Mostly Adapters
One pleasant surprise was how little new application logic I actually had to write.
The MCP server needs to expose tools, but those tools ultimately just answer questions about the succession database. The code to answer those questions already existed.
For example, the application’s model layer already contained methods such as:
sovereign_on_date()line_of_succession()
These methods power parts of the website itself, so they already encapsulate all of the business rules and database queries.
The MCP implementation simply acts as an adapter.
When a tool call arrives, the server extracts the arguments, validates them and passes them to the existing model methods:
sub _call_tool ($self, $tool_name, $args) {
  my $tool = $self->_tool_dispatch->{$tool_name};

  return $tool->($args);
}
The tool implementations themselves are deliberately thin:
sub sovereign_on_date ($self, $args) {
  my $date = $args->{date};

  my $sovereign = $self->model->sovereign_on_date($date);

  ...

}
That’s exactly how I wanted it to work.
The MCP layer doesn’t know how to calculate a line of succession or determine who was sovereign on a particular date. It simply knows how to expose those capabilities through the protocol.
This is one of the advantages of adding MCP to an existing application. If your business logic is already cleanly separated from your web interface, an MCP server often becomes surprisingly straightforward to implement.
In many ways, adding MCP feels less like building a new application and more like adding another interface alongside the website and API.
The YAML Epiphany
The most interesting design decision came a little later.
Initially, the tool definitions lived in Perl data structures.
That worked, but it quickly became obvious that I was duplicating information.
The MCP server needed tool descriptions.
The documentation page needed tool descriptions.
The schemas needed to be defined somewhere.
And every change required updating multiple places.
The obvious answer was to move all of the tool definitions into a YAML file.
The MCP module now loads its tool definitions at startup:
sub _build__tools ($self) { return LoadFile($self->tools_file); }
The result is a single source of truth.
The same YAML file drives:
- The
tools/listresponse - Tool metadata
- JSON schemas
- Human-readable documentation
Adding a new tool now involves updating one file and writing the code that implements it.
Everything else follows automatically.
Here’s the current YAML file:
# data/mcp-tools.yml

- name: sovereign_on_date
  description: Return the British sovereign on a given date.
  documentation: |
    Looks up the reigning British sovereign for the supplied date.

    Use this when answering questions such as “Who was sovereign on
    6 February 1952?”
  inputSchema:
    type: object
    properties:
      date:
        type: string
        description: Date in YYYY-MM-DD format.
    required:
      - date

- name: line_of_succession
  description: Return the line of succession on a given date.
  documentation: |
    Returns people in the line of succession.

    If no date is supplied, the current line of succession is returned.
  inputSchema:
    type: object
    properties:
      date:
        type: string
        description: Optional date in YYYY-MM-DD format. Omit for the current line of succession.
      limit:
        type: integer
        description: Maximum number of successors to return.
        minimum: 1
        maximum: 100
      required: []
Looking back, this is probably the part of the design I’m happiest with. It feels very Perl-ish: keep configuration as data and avoid duplicating information wherever possible.
Human Documentation Matters
One thing I noticed while exploring other MCP servers is that many of them are effectively invisible to humans.
You know an endpoint exists.
You know it speaks MCP.
But unless you inspect the protocol responses manually, you don’t really know what it does.
I decided to add a conventional web page at /mcp.
The page lists all available tools, their descriptions and their schemas.
The nice part is that there is no duplicated documentation.
The page is generated from the same YAML definitions used by the MCP server itself.
If I add a new tool tomorrow, both the machine-readable and human-readable views update automatically.
Structured Data and Text Responses
Another nice feature of MCP is that tool results can include both structured data and human-readable text.
For example, a tool response might contain:
{
  "content": [ {
    "type": "text",
    "text": "The sovereign on 14 November 1948 was George VI."
    } ],
  "structuredContent": {
    ...
  }
}
The structured content is useful for software.
The text is useful for humans and language models.
Both are generated from the same underlying data.
That gives AI clients flexibility while ensuring consistency.
Getting Listed
Once everything was working, I submitted the server to the MCP directory at mcpservers.org.
That might seem like a small step, but discoverability is important.
An MCP server hidden on a random website isn’t much use if nobody knows it exists.
Directories like that are rapidly becoming the equivalent of API catalogues for the AI era.
Being listed means developers and AI enthusiasts can find the service without first discovering the website.
Was It Worth It?
Absolutely.
The amount of code required was surprisingly small. Most of the work wasn’t implementing the protocol; it was deciding how best to expose the data.
More importantly, it opens the site up to an entirely new audience: AI agents.
Historically, websites were built for humans and APIs were built for developers.
MCP introduces a third category: services designed specifically for AI systems.
For a structured-data site like Line of Succession, that’s a natural fit.
Will MCP still be the dominant standard in five years’ time? I have no idea. The AI industry changes too quickly to make confident predictions.
But right now it has significant momentum, broad industry support and a growing ecosystem of tools.
And if nothing else, it’s rather satisfying to ask an AI who was on the throne on a particular date and know that the answer came directly from my database rather than from whatever the model happened to remember.
The post Teaching AI About the British Monarchy with MCP first appeared on Perl Hacks.
One of the defining characteristics of a good programmer is an instinct for keeping implementation details in the correct layer of an application.
That sounds abstract, but it turns out to explain a huge amount of the progress we’ve made in software development over the last twenty-five years.
And nowhere is that clearer than in Perl web development.
Many of us who built web applications during the dotcom boom spent years learning this lesson the hard way.
We wrote CGI programs that:
- parsed HTTP requests
- generated HTML by hand
- connected directly to databases
- embedded SQL inline
- mixed business logic with presentation
- relied on Apache behaviour
- assumed specific filesystem layouts
- and often only worked on one particular server configuration
It all worked. Until it didn’t.
The history of Perl web development is, in many ways, the history of gradually moving implementation details into more appropriate architectural layers.
The Early CGI Years
Early Perl CGI applications were often a single giant script.
You’d open a file and see:
- request handling
- authentication
- HTML generation
- SQL queries
- business logic
- configuration
- deployment assumptions
…all mixed together in a glorious ball of mud.
Something like this:
#!/usr/bin/perl

use CGI;
use DBI;

my $cgi = CGI->new;

print $cgi->header;
print "<html><body>";

my $dbh = DBI->connect(
  "dbi:mysql:test",
  "user",
  "pass"
);

my $sth = $dbh->prepare(
  "select * from users where id = ?"
);

$sth->execute($cgi->param('id'));

while (my $row = $sth->fetchrow_hashref) {
  print "<h1>$row->{name}</h1>";
}

print "</body></html>";
At the time, this felt perfectly normal.
And to be fair, it was a huge step forward from static HTML sites.
But the design had a fundamental problem:
Everything knew too much about everything else.
The application logic knew:
- how HTTP worked
- how HTML worked
- how Apache launched CGI scripts
- how the database worked
- how the operating system was configured
Every concern leaked into every other concern.
That made systems:
- hard to test
- hard to reuse
- hard to deploy
- hard to scale
- and terrifying to change
The First Big Lesson: Put Logic in Libraries
One of the first signs of a developer maturing is the realisation that application logic should live in reusable modules, not in front-end scripts.
Instead of this:
if ($user->{status} eq 'gold') {
  $discount = 0.2;
}
being embedded directly in a CGI script, it becomes:
my $discount = $user->discount_rate;
That sounds like a small change, but architecturally it’s enormous.
Now the business logic lives in a library.
And once that happens, several good things follow automatically.
Multiple Interfaces Become Possible
If the logic is in modules, then:
- a web front-end
- a CLI tool
- a REST API
- a cron job
- a queue worker
…can all use the same underlying code.
The interface layer becomes thin.
The application itself becomes independent of how users interact with it.
That’s a huge increase in flexibility.
Testing Becomes Easier
Testing CGI scripts was always awkward.
Testing modules is straightforward.
You can instantiate objects, call methods, and inspect results without needing a web server or HTTP requests.
The easier code is to test, the more likely it is to be tested.
And tested code tends to survive longer.
Deployment Becomes Safer
Once the core behaviour is isolated from the interface layer, replacing the interface becomes far less risky.
You can redesign the UI without rewriting the application.
That separation is one of the foundations of maintainable software.
The PSGI Revolution
The next big architectural leap in Perl web development came with PSGI and Plack.
Younger developers may not fully appreciate how painful web deployment used to be.
In the early 2000s, moving an application between hosting environments could require substantial rewrites.
- A CGI application worked one way.
- A mod_perl application worked another way.
- FastCGI had its own quirks.
- Embedded Apache handlers behaved differently again.
Many Perl developers spent years repeatedly rewriting applications simply because deployment environments changed.
That was madness.
The deployment model is an operational concern.
It should not affect application architecture.
PSGI fixed this by defining a standard interface between web applications and web servers.
The core idea was beautifully simple:
A web application is just a function that receives an environment and returns a response.
Once that abstraction existed, applications no longer cared whether they were running:
- as CGI
- under mod_perl
- inside FastCGI
- under Starman
- behind nginx
- on a development laptop
- or inside a cloud container
The deployment details moved down a layer.
Exactly where they belonged.
This was one of the most important architectural improvements Perl web development ever made.
And it reflected a broader truth:
Good abstractions stop lower-level implementation details leaking upward.
The Transitional Era: FatPacker and cpanfile
There was also an interesting intermediate stage between traditional Perl deployments and full containerisation.
For years, one of the hardest parts of deploying Perl applications was dependency management.
You’d move an application to a new server and discover:
- the wrong module version
- missing XS libraries
- incompatible Perl versions
- or an entire dependency tree that worked perfectly on the developer’s machine and nowhere else
Large parts of Perl deployment culture evolved around coping with this problem.
Tools like cpanfile improved things by making dependencies explicit and reproducible.
Instead of vaguely documenting requirements in a README, applications could formally declare:
requires 'Dancer2';
requires 'DBIx::Class';
requires 'Template';
That may seem obvious now, but it was a major improvement in deployment reliability.
Then tools like App::FatPacker went even further by packaging dependencies directly alongside applications.
Instead of relying on the target server’s Perl environment, applications could carry much of their runtime context with them.
These tools didn’t completely solve deployment portability:
- system libraries still mattered
- Perl versions still mattered
- operating system differences still mattered
…but they represented an important shift in thinking.
The industry was gradually realising that:
- deployment environments were part of the application
- reproducibility mattered
- and infrastructure assumptions needed to be controlled
Containers eventually pushed this idea to its logical conclusion by packaging not just Perl dependencies, but the entire runtime environment.
In hindsight, tools like cpanfile and FatPacker were stepping stones toward modern container-based deployment models.
Containers Are the Same Idea Again
Docker and containers are simply the same architectural principle repeated one layer lower.
Before containers, deployments were often fragile and highly environment-specific.
Applications depended on:
- particular Linux distributions
- specific Perl versions
- installed system libraries
- hand-configured servers
- undocumented setup steps
Developers became experts in “works on my machine”.
Operations teams became experts in swearing.
Containers changed the model.
Instead of deploying:
- source code
…you deploy:
- a complete runtime environment
Now the application no longer cares whether it runs:
- on bare metal
- on a VPS
- in Kubernetes
- in ECS
- in Cloud Run
- or on someone’s laptop
Again:
- infrastructure concerns move downward
- application concerns stay upward
The boundaries become cleaner.
The Pattern Repeats Everywhere
Once you notice this pattern, you see it throughout software engineering.
Templates
Template systems separate:
- presentation
from
- application logic
HTML should not contain database code.
Business logic should not contain giant blobs of HTML.
ORMs and Database Layers
DBI separates applications from database engines.
ORMs separate applications from raw SQL structure.
Again:
- implementation details move downward
Configuration
Configuration belongs outside code.
Deployment-specific values should not be embedded in applications.
APIs
Clients should not care whether data comes from:
- PostgreSQL
- Redis
- another service
- a queue
- flat files
- or magic elves
That’s the implementation’s problem.
The Goal Is Not Abstraction for Its Own Sake
Of course, experienced developers also know that abstractions can become ridiculous.
Some abstractions simplify systems.
Others merely hide complexity behind six additional layers of YAML.
Joel Spolsky’s “Law of Leaky Abstractions” remains painfully relevant.
The goal is not abstraction itself.
The goal is to isolate genuinely volatile details.
Good abstractions protect systems from change.
Bad abstractions merely obscure reality.
The Real Skill
The deeper lesson here is that software architecture is largely about deciding:
“What belongs where?”
Experienced developers develop an instinct for:
- which details are likely to change
- which layers should know about which concerns
- and where boundaries should exist
That instinct is often more important than language choice, frameworks, or technology stacks.
And if you spent the early 2000s rewriting CGI applications to run under mod_perl, you probably learned that lesson the hard way.
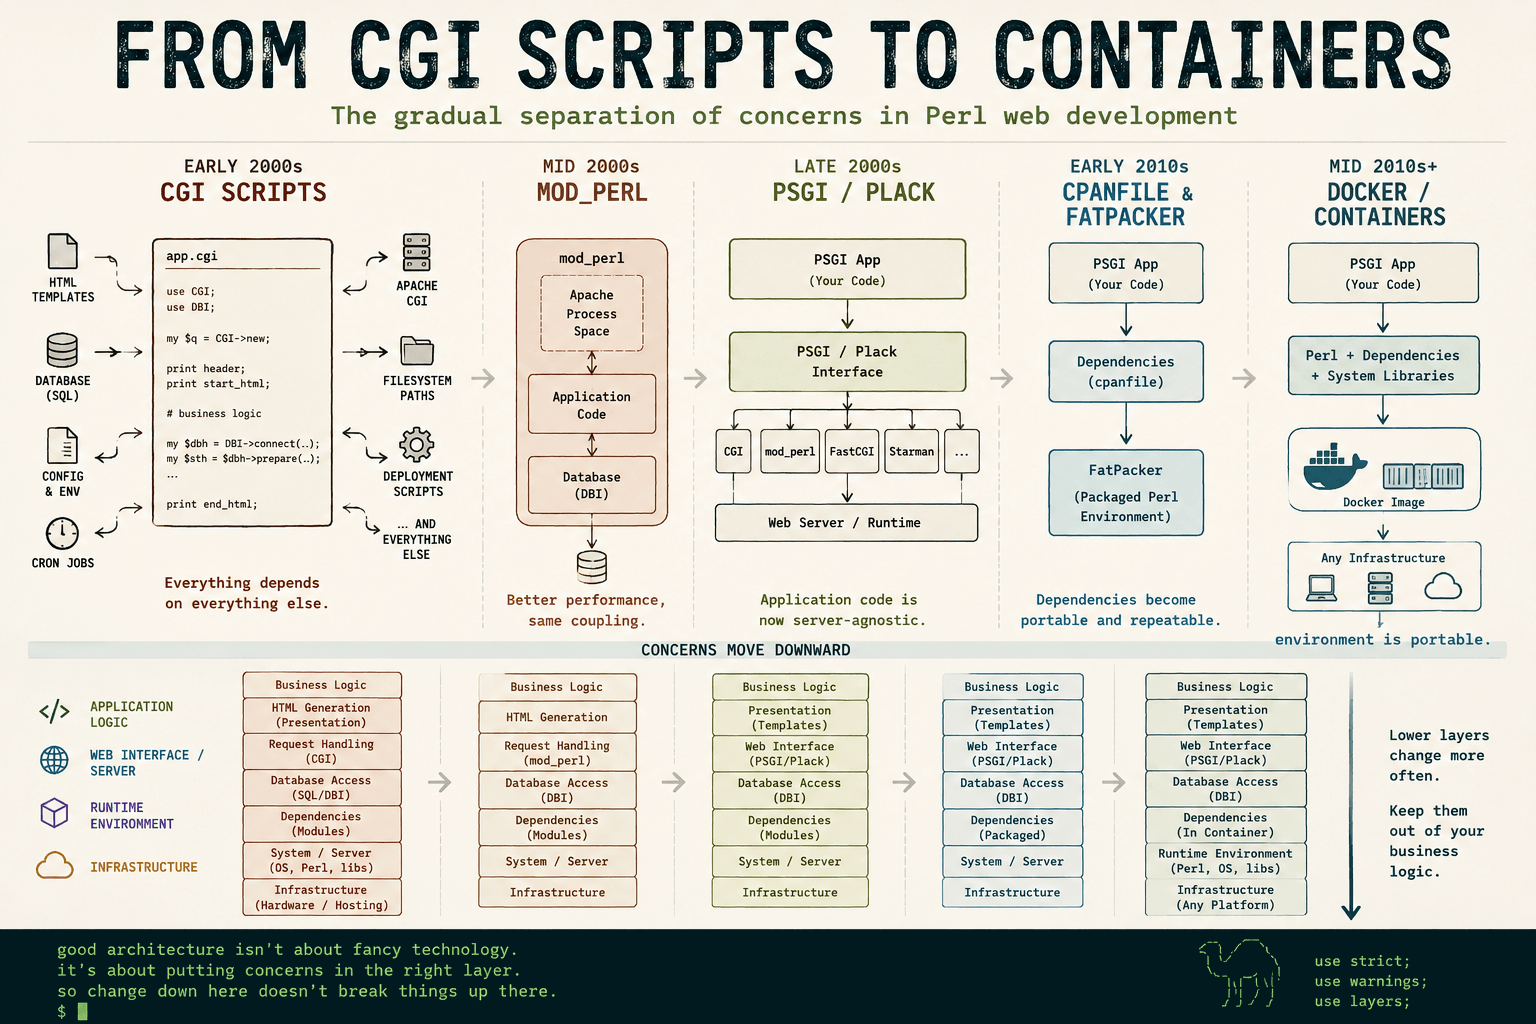
The post The Long Road from CGI to Containers first appeared on Perl Hacks.

Someone asked me on LinkedIn recently how to cross-post blog content from a GitHub Pages site to places like Medium, dev.to and LinkedIn.
Someone asked me on LinkedIn recently how to cross-post blog content from a GitHub Pages site to places like Medium, dev.to and LinkedIn.
I started writing a quick reply and, as often happens, it turned into something longer. So here’s the slightly more organised version.
Two different problems
There are actually two separate things people mean when they ask this.
1. Sharing links on social media
This is the easy one.
When I publish a post, I’ll usually share it by:
- pasting the link
- adding a short description
- maybe tweaking the wording per platform
The only slightly technical thing worth doing here is making sure your site has Open Graph tags set up properly.
That ensures:
- the right title appears
- the right description is used
- and, importantly, the right image is shown
If you don’t do this, your carefully written post ends up looking like a random bare link.
What about “Share to…” buttons?
Many blogging platforms (and themes) offer “Share to Facebook/LinkedIn/etc.” buttons.
They:
- generate a pre-filled post
- save a bit of time
I don’t tend to use them – I prefer writing a slightly different intro per platform – but they’re perfectly reasonable if you want something quick and consistent.
2. Reposting the article elsewhere
This is where it gets more interesting.
My usual workflow is:
- write on my own site (WordPress in my case, but GitHub Pages is fine)
- then repost to other platforms
The two I use most are Medium and dev.to – and they take slightly different approaches.
First requirement: you need a web feed
If you want any level of automation, your site needs an RSS/Atom feed.
- WordPress: you get this automatically
- GitHub Pages: depends how your site is built
A lot of people use Jekyll on GitHub Pages (it’s the default and best-supported option), but it’s not the only choice — you can also use other static site generators or even pre-built HTML.
Whichever approach you use, you’ll need to make sure it produces a web feed.
If you’re using Jekyll
Add the official feed plugin:
plugins:
- jekyll-feed
GitHub Pages supports this plugin natively, so there’s no extra build step needed.
Your feed will usually be available at:
/feed.xml
If you’re using something else
Most static site generators (Hugo, Eleventy, Astro, etc.) can generate feeds, but:
- it’s often not enabled by default
- the configuration varies
So you’ll need to:
- check the documentation for your tool
- enable or add a feed generator
- confirm the feed URL works
That feed is what tools like dev.to use to discover your posts.
Medium: “Import a story”
Medium has a built-in Import a story feature.
You give it the URL of your original post and it:
- pulls in the content
- recreates the article
- lets you edit it before publishing
It works surprisingly well.
The only slight downside is that it always takes me a few minutes to find the option. It’s on your Stories page (when you’re logged in). Look for the big button in the top right corner.
dev.to: RSS-based automation
dev.to does something a bit cleverer.
You can:
- point it at your RSS/Atom feed
- and it will automatically create draft posts for new articles
A few notes from experience:
- it can take a few hours for drafts to appear
- formatting is usually good but you’ll probably want to tweak it a bit
- it often misses the featured image, so I add that manually
The really important bit: canonical URLs
This is the part that many people miss.
When you repost content, you are technically creating duplicate content – which search engines don’t love.
However…
If you use the official import tools:
- Medium
- dev.to
…they both add a canonical link back to your original post.
That’s the equivalent of saying:
“This content originally lives over here – treat that as the primary version.”
Which means:
- your original site gets the SEO benefit
- you don’t get penalised for duplication
If you’re manually copying and pasting, you need to be careful about this – or at least be aware of the trade-off.
What about LinkedIn?
LinkedIn is a bit different.
As far as I’m aware, there isn’t a clean equivalent of:
- Medium’s import tool
- or dev.to’s RSS integration
It’s worth checking – platforms change – but I haven’t found anything comparable.
So my approach is:
- write a short summary
- link to the original post
That also tends to fit LinkedIn better as a platform.
I’ve seen various guides suggesting ways to automate LinkedIn reposting, but many of them rely on long-dead platforms or brittle integrations. As far as I can tell, there’s no clean, supported equivalent of Medium’s import tool or dev.to’s RSS integration. These days, I treat LinkedIn as a place to promote posts rather than republish them.
Is any of this automated?
A bit, but not completely.
- Medium: semi-automated (import tool)
- dev.to: semi-automated (RSS → draft)
- LinkedIn: manual
You could build a fully automated pipeline with APIs and scripts.
But in practice:
- a small amount of manual editing is useful
- each platform benefits from slightly different positioning
So I don’t try to over-automate it.
The takeaway
There’s no standard protocol for cross-posting blog content.
What you actually have is:
- a few helpful platform features
- a bit of light automation
- and some copy-and-paste
And honestly, that works perfectly well.
Like most things on the web, there’s no single ‘right’ way to do this — just a collection of tools that mostly work if you don’t try to be too clever.
If you’d like help building this kind of thing without overcomplicating it, there’s a brief overview of what I do here:
The post How I Cross-Post Blog Articles (Without Making It Complicated) appeared first on Davblog.

I got a piece of spam the other day.
That’s not unusual, of course. What was unusual was that this one was… good.
Or at least, it was convincingly good.
Here’s what I received:
Hi Dave,
Just a few outbound idea I wanted to share for targeting modern Perl programmers :
• Reach out to senior Perl developers at tech firms, referencing clear, practical ebooks for modern Perl programmers that improve code quality.
• Engage junior Perl programmers at startups, citing real‐world techniques and guidance from authors who use Perl daily to accelerate learning.
• Target Perl maintainers at open‐source projects, highlighting the Design Patterns in Modern Perl book with tested examples that streamline code maintenance.
Btw, if you’re interested, one of our outbound experts would be happy to take a peek your current GTM motion and offer thoughts — no expense to you.
(They probably have even better ideas than I do!)
Worth exploring?
Now, you can see what’s going on here.
Someone has clearly pointed an LLM at my profile on LinkedIn and said something like:
Write a short outreach email with ideas tailored to this person.
And, to be fair, it’s done a decent job.
It knows I work with Perl.
It knows I write books.
It even knows enough to mention Design Patterns in Modern Perl.
Ten years ago, this level of targeting would have required actual effort. Now it’s effectively free.
And that’s the problem.
The illusion of understanding
Because while they’ve superficially got a lot right in their email, there are several fundamental points they’ve missed.
- They concentrate on my work with Perl School Publishing, which is a relatively small part of my work
- They don’t seem to realise that I’m a one-person company and have almost never used marketing of any kind
- They don’t realise that most of my work comes from repeat business or word of mouth
- They don’t realise that I’m semi-retired and only work when I want to
- They don’t realise that I’m the kind of person who would never market his services using spam
That last one feels particularly important.
Because, let’s be completely clear here, what they’re proposing is spam.
Let’s not pretend otherwise
There’s a tendency in the industry to dress this up with nicer language.
“Outbound lead generation.”
“GTM strategy.”
“Targeted outreach.”
But if you strip that away, what remains is:
Sending unsolicited commercial messages to people who have not asked to receive them.
In other words, spam.
You can make it more targeted.
You can make it more personalised.
You can even make it sound thoughtful.
But none of that changes the underlying fact that the recipient didn’t ask for it.
Clever, but not smart
And this is where the use of AI becomes interesting.
Because this email is clearly the product of a system that can:
- Read a profile
- Extract key themes
- Generate plausible, relevant-sounding ideas
It has, in some sense, understood me.
Except it hasn’t.
It knows what I talk about.
It has no idea what I want.
It doesn’t know my situation.
It doesn’t know my preferences.
It doesn’t know my values.
And so it produces something that feels eerily close to being relevant — but completely misses the mark.
The cost of cheap personalisation
The real shift here is economic.
Personalisation used to be expensive.
You had to actually research someone.
You had to think about whether contacting them made sense.
Now, you can do it at scale, for effectively zero cost.
Which means we’re about to see a lot more of this:
- Messages that feel tailored
- Messages that reference your work
- Messages that almost make sense
But are still, fundamentally, just unsolicited outreach.
The bar hasn’t just been lowered. It’s been automated.
Use your powers only for good
None of this is a criticism of the technology.
The ability to take a body of text and generate something that feels this relevant is genuinely impressive.
But like any powerful tool, the question isn’t can you do it.
It’s should you.
If your use of AI boils down to:
How can I send more unsolicited messages, more efficiently?
…then all you’ve really done is scale a bad idea.
A final thought
There was a moment, reading that email, where I thought:
This is almost good enough to work.
And that’s the worrying part.
Not that it’s spam.
But that it’s convincing spam.
If this is where we are now, then the real challenge isn’t filtering out the obvious rubbish.
It’s learning to recognise the messages that sound like they understand you — but don’t.
If you’re curious about the kind of work I actually do (none of which involves outbound lead generation), there’s a brief overview here:
Originally published at https://blog.dave.org.uk on April 26, 2026.
I got a piece of spam the other day.
That’s not unusual, of course. What was unusual was that this one was… good.
Or at least, it was convincingly good.
Here’s what I received:
Hi Dave,
Just a few outbound idea I wanted to share for targeting modern Perl programmers :
- Reach out to senior Perl developers at tech firms, referencing clear, practical ebooks for modern Perl programmers that improve code quality.
- Engage junior Perl programmers at startups, citing real‐world techniques and guidance from authors who use Perl daily to accelerate learning.
- Target Perl maintainers at open‐source projects, highlighting the Design Patterns in Modern Perl book with tested examples that streamline code maintenance.
Btw, if you’re interested, one of our outbound experts would be happy to take a peek your current GTM motion and offer thoughts – no expense to you.
(They probably have even better ideas than I do!)
Worth exploring?
Now, you can see what’s going on here.
Someone has clearly pointed an LLM at my profile on LinkedIn and said something like:
Write a short outreach email with ideas tailored to this person.
And, to be fair, it’s done a decent job.
It knows I work with Perl.
It knows I write books.
It even knows enough to mention Design Patterns in Modern Perl.
Ten years ago, this level of targeting would have required actual effort. Now it’s effectively free.
And that’s the problem.
The illusion of understanding
Because while they’ve superficially got a lot right in their email, there are several fundamental points they’ve missed.
- They concentrate on my work with Perl School Publishing, which is a relatively small part of my work
- They don’t seem to realise that I’m a one-person company and have almost never used marketing of any kind
- They don’t realise that most of my work comes from repeat business or word of mouth
- They don’t realise that I’m semi-retired and only work when I want to
- They don’t realise that I’m the kind of person who would never market his services using spam
That last one feels particularly important.
Because, let’s be completely clear here, what they’re proposing is spam.
Let’s not pretend otherwise
There’s a tendency in the industry to dress this up with nicer language.
“Outbound lead generation.”
“GTM strategy.”
“Targeted outreach.”
But if you strip that away, what remains is:
Sending unsolicited commercial messages to people who have not asked to receive them.
In other words, spam.
You can make it more targeted.
You can make it more personalised.
You can even make it sound thoughtful.
But none of that changes the underlying fact that the recipient didn’t ask for it.
Clever, but not smart
And this is where the use of AI becomes interesting.
Because this email is clearly the product of a system that can:
- Read a profile
- Extract key themes
- Generate plausible, relevant-sounding ideas
It has, in some sense, understood me.
Except it hasn’t.
It knows what I talk about.
It has no idea what I want.
It doesn’t know my situation.
It doesn’t know my preferences.
It doesn’t know my values.
And so it produces something that feels eerily close to being relevant — but completely misses the mark.
The cost of cheap personalisation
The real shift here is economic.
Personalisation used to be expensive.
You had to actually research someone.
You had to think about whether contacting them made sense.
Now, you can do it at scale, for effectively zero cost.
Which means we’re about to see a lot more of this:
- Messages that feel tailored
- Messages that reference your work
- Messages that almost make sense
But are still, fundamentally, just unsolicited outreach.
The bar hasn’t just been lowered. It’s been automated.
Use your powers only for good
None of this is a criticism of the technology.
The ability to take a body of text and generate something that feels this relevant is genuinely impressive.
But like any powerful tool, the question isn’t can you do it.
It’s should you.
If your use of AI boils down to:
How can I send more unsolicited messages, more efficiently?
…then all you’ve really done is scale a bad idea.
A final thought
There was a moment, reading that email, where I thought:
This is almost good enough to work.
And that’s the worrying part.
Not that it’s spam.
But that it’s convincing spam.
If this is where we are now, then the real challenge isn’t filtering out the obvious rubbish.
It’s learning to recognise the messages that sound like they understand you — but don’t.
If you’re curious about the kind of work I actually do (none of which involves outbound lead generation), there’s a brief overview here:
The post Use Your Powers Only for Good, Clark appeared first on Davblog.
Every month, I write a newsletter which (among other things) discusses some of the technical projects I’ve been working on. It’s a useful exercise — partly as a record for other people, but mostly as a way for me to remember what I’ve actually done.
Because, as I’m sure you’ve noticed, it’s very easy to forget.
So this month, I decided to automate it.
(And, if you’re interested in the end result, this is also a good excuse to mention that the newsletter exists. Two birds, one stone.)
The Problem
All of my Git repositories live somewhere under /home/dave/git. Over time, that’s become… less organised than it might be. Some repos are directly under that directory, others are buried a couple of levels down, and I’m fairly sure there are a few I’ve completely forgotten about.
What I wanted was:
- Given a month and a year
- Find all Git repositories under that directory
- Identify which ones had commits in that month
- Summarise the work done in each repo
The first three are straightforward enough. The last one is where things get interesting.
Finding the Repositories
The first step is walking the directory tree and finding .git directories. This is a classic Perl task — File::Find still does exactly what you need.
use v5.40;
use File::Find;

sub find_repos ($root) {
  my @repos;

  find(
    sub {
      return unless $_ eq '.git';
      push @repos, $File::Find::dir;
    },
    $root
  );

  return @repos;
}
This gives us a list of repository directories to inspect. It’s simple, robust, and doesn’t require any external dependencies.
(There are, of course, other ways to do this — you could shell out to fd or find, for example — but keeping it in Perl keeps everything nicely self-contained.)
Getting Commits for a Month
For each repo, we can run git log with appropriate date filters.
sub commits_for_month ($repo, $since, $until) {
  my $cmd = sprintf(
    q{git -C %s log --since="%s" --until="%s" --pretty=format:"%%s"},
    $repo, $since, $until
  );

  my @commits = `$cmd`;
  chomp @commits;

  return @commits;
}
Where
$since and $until define the month we’re interested in. I’ve been using something like:
my $since = "$year-$month-01";
my $until = "$year-$month-31"; # good enough for this purpose
Yes, that’s a bit hand-wavy around month lengths. No, it doesn’t matter in practice. Sometimes “good enough” really is good enough.
A Small Gotcha
It turns out I have a few repositories where I never got around to making a first commit. In that case, git log helpfully explodes with:
fatal: your current branch ‘master’ does not have any commits yet
The fix is simply to ignore failures:
my @commits = `$cmd 2>/dev/null`;
If there are no commits, we just get an empty list and move on. No warnings, no noise.
This is one of those little bits of defensive programming that makes the difference between a script you run once and a script you’re happy to run every month.
Summarising the Work
Once we have a list of commit messages, we can summarise them.
And this is where I cheated slightly.
I used OpenAPI::Client::OpenAI to feed the commit messages into an LLM and ask it to produce a short summary.
Something along these lines:
use OpenAPI::Client::OpenAI;

sub summarise_commits ($commits) {
  my $client = OpenAPI::Client::OpenAI->new(
    api_key => $ENV{OPENAI_API_KEY},
  );

  my $text = join "\n", @$commits;

  my $response = $client->chat->completions->create({
    model => 'gpt-4.1-mini',
    messages => [{
      role => 'user',
      content => "Summarise the following commit messages:\n\n$text",
    }],
  });

  return $response->choices->[0]->message->content;
}
Is this overkill? Almost certainly.
Could I have written some heuristics to group and summarise commit messages? Possibly.
Would it have been as much fun? Definitely not.
And in practice, it works remarkably well. Even messy, inconsistent commit messages tend to turn into something that looks like a coherent summary of work.
Putting It Together
For each repo:
- Get commits for the month
- Skip if there are none
- Generate a summary
- Print the repo name and summary
The output looks something like:
my-project
-----------
Refactored database layer, added caching, and fixed several edge-case bugs.

another-project
---------------
Initial scaffolding, basic API endpoints, and deployment configuration.
Which is already a pretty good starting point for a newsletter.
A Nice Side Effect
One unexpected benefit of this approach is that it surfaces projects I’d forgotten about.
Because the script walks the entire directory tree, it finds everything — including half-finished experiments, abandoned ideas, and repos I created at 11pm and never touched again.
Sometimes that’s useful. Sometimes it’s mildly embarrassing.
But it’s always interesting.
What Next?
This is very much a first draft.
It works, but it’s currently a script glued together with shell commands and assumptions about my directory structure. The obvious next step is to:
- Turn it into a proper module
- Add tests
- Clean up the API
- Release it to CPAN
At that point, it becomes something other people might actually want to use — not just a personal tool with hard-coded paths and questionable date handling.
A Future Enhancement
One idea I particularly like is to run this automatically using GitHub Actions.
For example:
- Run monthly
- Generate summaries for that month
- Commit the results to a repository
- Publish them via GitHub Pages
Over time, that would build up a permanent, browsable record of what I’ve been working on.
It’s a nice combination of:
- automation
- documentation
- and a gentle nudge towards accountability
Which is either a fascinating historical archive…
…or a slightly alarming reminder of how many half-finished projects I have.
Closing Thoughts
This started as a small piece of automation to help me write a newsletter. But it’s turned into a nice example of what Perl is still very good at:
- Gluing systems together
- Wrapping command-line tools
- Handling messy real-world data
- Adding just enough intelligence to make the output useful
And, occasionally, outsourcing the hard thinking to a machine.
The code (such as it is currently is) is on GitHub at https://github.com/davorg/git-month-summary.
If you’re interested in the kind of projects this helps summarise, you can find my monthly newsletter over on Substack.
And if I get round to turning this into a CPAN module, I’ll let you know – well, if you’re subscribed to the newsletter!
The post Summarising a Month of Git Activity with Perl (and a Little Help from AI) first appeared on Perl Hacks.
Every month, I write a newsletter which (among other things) discusses some of the technical projects I’ve been working on. It’s a useful exercise — partly as a record for other people, but mostly as a way for me to remember what I’ve actually done.
Because, as I’m sure you’ve noticed, it’s very easy to forget.
So this month, I decided to automate it.
(And, if you’re interested in the end result, this is also a good excuse to mention that the newsletter exists. Two birds, one stone.)
The Problem
All of my Git repositories live somewhere under /home/dave/git. Over time, that’s become… less organised than it might be. Some repos are directly under that directory, others are buried a couple of levels down, and I’m fairly sure there are a few I’ve completely forgotten about.
What I wanted was:
- Given a month and a year
- Find all Git repositories under that directory
- Identify which ones had commits in that month
- Summarise the work done in each repo
The first three are straightforward enough. The last one is where things get interesting.
Finding the Repositories
The first step is walking the directory tree and finding .git directories. This is a classic Perl task — File::Find still does exactly what you need.
use v5.40;
use File::Find;

sub find_repos ($root) {
  my @repos;

  find(
    sub {
      return unless $_ eq '.git';
      push @repos, $File::Find::dir;
    },
    $root
  );

  return @repos;
}
This gives us a list of repository directories to inspect. It’s simple, robust, and doesn’t require any external dependencies.
(There are, of course, other ways to do this — you could shell out to fd or find, for example — but keeping it in Perl keeps everything nicely self-contained.)
Getting Commits for a Month
For each repo, we can run git log with appropriate date filters.
sub commits_for_month ($repo, $since, $until) {
  my $cmd = sprintf(
    q{git -C %s log --since="%s" --until="%s" --pretty=format:"%%s"},
    $repo, $since, $until
  );

  my @commits = `$cmd`;
  chomp @commits;

  return @commits;
}
Where $since and $until define the month we’re interested in. I’ve been using something like:
my $since = "$year-$month-01";
my $until = "$year-$month-31"; # good enough for this purpose
Yes, that’s a bit hand-wavy around month lengths. No, it doesn’t matter in practice. Sometimes “good enough” really is good enough.
A Small Gotcha
It turns out I have a few repositories where I never got around to making a first commit. In that case, git log helpfully explodes with:
fatal: your current branch ‘master’ does not have any commits yet
Which is fair enough — but not helpful in a script that’s supposed to quietly churn through dozens of repositories.
The fix is simply to ignore failures:
my @commits = `$cmd 2>/dev/null`;
If there are no commits, we just get an empty list and move on. No warnings, no noise.
This is one of those little bits of defensive programming that makes the difference between a script you run once and a script you’re happy to run every month.
Summarising the Work
Once we have a list of commit messages, we can summarise them.
And this is where I cheated slightly.
I used OpenAPI::Client::OpenAI to feed the commit messages into an LLM and ask it to produce a short summary.
Something along these lines:
use OpenAPI::Client::OpenAI;

sub summarise_commits ($commits) {
  my $client = OpenAPI::Client::OpenAI->new(
    api_key => $ENV{OPENAI_API_KEY},
  );

  my $text = join "\n", @$commits;

  my $response = $client->chat->completions->create({
    model => 'gpt-4.1-mini',
    messages => [{
      role => 'user',
      content => "Summarise the following commit messages:\n\n$text",
    }],
  });

 return $response->choices->[0]->message->content;
}
Is this overkill? Almost certainly.
Could I have written some heuristics to group and summarise commit messages? Possibly.
Would it have been as much fun? Definitely not.
And in practice, it works remarkably well. Even messy, inconsistent commit messages tend to turn into something that looks like a coherent summary of work.
Putting It Together
For each repo:
- Get commits for the month
- Skip if there are none
- Generate a summary
- Print the repo name and summary
The output looks something like:
my-project
-----------
Refactored database layer, added caching, and fixed several edge-case bugs.

another-project
---------------
Initial scaffolding, basic API endpoints, and deployment configuration.
Which is already a pretty good starting point for a newsletter.
A Nice Side Effect
One unexpected benefit of this approach is that it surfaces projects I’d forgotten about.
Because the script walks the entire directory tree, it finds everything — including half-finished experiments, abandoned ideas, and repos I created at 11pm and never touched again.
Sometimes that’s useful. Sometimes it’s mildly embarrassing.
But it’s always interesting.
What Next?
This is very much a first draft.
It works, but it’s currently a script glued together with shell commands and assumptions about my directory structure. The obvious next step is to:
- Turn it into a proper module
- Add tests
- Clean up the API
- Release it to CPAN
At that point, it becomes something other people might actually want to use — not just a personal tool with hard-coded paths and questionable date handling.
A Future Enhancement
One idea I particularly like is to run this automatically using GitHub Actions.
For example:
- Run monthly
- Generate summaries for that month
- Commit the results to a repository
- Publish them via GitHub Pages
Over time, that would build up a permanent, browsable record of what I’ve been working on.
It’s a nice combination of:
- automation
- documentation
- and a gentle nudge towards accountability
Which is either a fascinating historical archive…
…or a slightly alarming reminder of how many half-finished projects I have.
Closing Thoughts
This started as a small piece of automation to help me write a newsletter. But it’s turned into a nice example of what Perl is still very good at:
- Gluing systems together
- Wrapping command-line tools
- Handling messy real-world data
- Adding just enough intelligence to make the output useful
And, occasionally, outsourcing the hard thinking to a machine.
The code (such as it is currently is) is on GitHub at https://github.com/davorg/git-month-summary.
If you’re interested in the kind of projects this helps summarise, you can find my monthly newsletter over on Substack.
And if I get round to turning this into a CPAN module, I’ll let you know – well, if you’re subscribed to the newsletter!
The post Summarising a Month of Git Activity with Perl (and a Little Help from AI) first appeared on Perl Hacks.

The Diary of Sir Peregrine Blatherwick, MP for Little Wittering (Private. Not for publication, lest my constituents discover what we…
The Diary of Sir Peregrine Blatherwick, MP for Little Wittering
(Private. Not for publication, lest my constituents discover what we actually do all day.)
February 20th, 1751
To Westminster, where we are once again engaged in the great business of the nation, which is to say, arguing about something no one understands but everyone has strong opinions on. This week it is the calendar, which the learned men say is wrong by eleven days. Eleven! A most alarming number of days to have misplaced.
It seems the rest of Europe follows a newer calendar, devised by a Pope, which I naturally distrust on principle. But the astronomers insist that the sun itself now keeps Catholic time and not English time, which puts us in a most awkward position, as it is difficult to pass an Act of Parliament instructing the sun to behave properly.
March 3rd, 1751
A committee meeting on the calendar. Very dull, but with excellent biscuits. We are told that unless we correct the calendar, the seasons will continue to drift, until eventually Christmas will be in summer and the harvest in spring, which would be very inconvenient for everyone, especially the geese.
The proposed solution is that we must remove eleven days from the year. Simply remove them, as if they had never happened. I asked where the days would go, and whether a man might choose to keep one or two for his personal use, but this suggestion was not well received.
March 18th, 1751
Great agitation now from the merchants and bankers, who care nothing for the sun but a great deal for interest payments. The difficulty is that the legal and financial year begins on Lady Day, March 25th, and if we shorten the year by eleven days, then rents, taxes, and interest will all be eleven days short, which the moneyed men say will ruin them entirely, though I note they are rarely ruined when money is going in the other direction.
Thus we are not, in truth, reforming the calendar to please the astronomers, but to ensure the Treasury does not lose eleven days of tax, which is a much more powerful argument.
April 2nd, 1751
After much debate, shouting, and one memorable incident involving two wigs and a snuff box, it is agreed that the tax year shall be moved forward by eleven days to compensate for the eleven days we intend to lose in September.
Thus the tax year, which began on March 25th, shall now begin on April 5th. This pleases the Treasury very much. It pleases no one else at all.
I am beginning to understand that the purpose of government is to take a simple problem and move it somewhere else so that it becomes complicated in a different way.
June 10th, 1751
Dined with a group of country MPs who are very concerned about the missing days. One asked whether he would still have to pay his servants for days that did not exist. Another asked whether his birthday would be shortened, and whether this would make him younger, which he seemed to think a great advantage.
No one asked whether their taxes would be shortened, which tells you everything about the success of the government’s plan.
September 2nd, 1752
We are told that, upon going to bed this night on the 2nd of September, we shall wake tomorrow on the 14th, having mislaid eleven days for the convenience of astronomers and the Treasury. I cannot help but think we are about to commit a very large and very official mistake.
I have written in my ledger that I owe a man money on September 10th, and I am now wondering whether this is the most convenient financial arrangement I have ever made.
September 14th, 1752
Extraordinary! Eleven days gone entirely. The streets are full of people claiming we have stolen their lives, which is an accusation usually reserved for highwaymen and doctors.
There were some small riots, with people shouting “Give us our eleven days!” which I think shows a touching faith in Parliament’s ability to give people extra time, when we cannot even end debates on time.
For my part, I feel exactly the same as I did eleven days ago, except that I am now late for several appointments.
January 5th, 1753
We are now using the new calendar, and the new tax year arrangement. Some confusion remains, which I expect will continue for the next hundred years or so, by which time everyone will have forgotten why we did this but will insist it is very important.
A clerk explained to me that because of leap years, the tax year will not always fall neatly, and so the start date has now settled upon April 6th in order to keep the number of taxable days correct over time.
I asked why we could not simply choose a sensible date, such as the first of the month, and was told this would cost the Treasury money, at which point the matter was considered closed.
April 6th, 1753
The new tax year begins today, on the sixth day of April, which is not the beginning of the year, nor the beginning of a month, nor any date that a sane man would choose for anything at all.
We have altered the calendar of a kingdom, moved the beginning of the year, deleted eleven days, confused every farmer, merchant, and lawyer in England, and all so the Treasury should not miss a single day’s tax.
A great deal of work has been done, a great many speeches made, and an enormous amount of confusion created, which I believe history will record as one of Parliament’s more efficient efforts.
Damn silly date though. I expect that will get put right in the future.
The post An Interesting Note Concerning Interest (or How the Sixth Day of April Came to Have an Altogether Unearned Importance in Our Calendar) appeared first on Davblog.
Every so often, a new data serialisation format appears and people get excited about it. Recently, one of those formats is TOON — Token-Oriented Object Notation. As the name suggests, it’s another way of representing the same kinds of data structures that you’d normally store in JSON or YAML: hashes, arrays, strings, numbers, booleans and nulls.
So the obvious Perl question is: “Ok, where’s the CPAN module?”
This post explains what TOON is, why some people think it’s useful, and why I decided to write a Perl module for it — with an interface that should feel very familiar to anyone who has used JSON.pm.
I should point out that I knew about Data::Toon but I wanted something with an interface that was more like JSON.pm.
—
What TOON Is
TOON stands for Token-Oriented Object Notation. It’s a textual format for representing structured data — the same data model as JSON:
- Objects (hashes)
- Arrays
- Strings
- Numbers
- Booleans
- Null
The idea behind TOON is that it is designed to be easy for both humans and language models to read and write. It tries to reduce punctuation noise and make the structure of data clearer.
If you think of the landscape like this:
| Format | Human-friendly | Machine-friendly | Very common |
|---|---|---|---|
| JSON | Medium | Very | Yes |
| YAML | High | Medium | Yes |
| TOON | High | High | Not yet |
TOON is trying to sit in the middle: simpler than YAML, more readable than JSON.
Whether it succeeds at that is a matter of taste — but it’s an interesting idea.
—
TOON vs JSON vs YAML
It’s probably easiest to understand TOON by comparing it to JSON and YAML. Here’s the same “person” record written in all three formats.
JSON
{
  "name": "Arthur Dent",
  "age": 42,
  "email": "arthur@example.com",
  "alive": true,
  "address": {
    "street": "High Street",
    "city": "Guildford"
   },
  "phones": [
    "01234 567890",
    "07700 900123"
  ]
}
YAML
name: Arthur Dent
age: 42
email: arthur@example.com
alive: true
address:
  street: High Street
  city: Guildford
phones:
  – 01234 567890
  – 07700 900123
TOON
name: Arthur Dent
age: 42
email: arthur@example.com”
alive: true
address:
  street: High Street
  city: Guildford
phones[2]: 01234 567890,07700 900123
You can see that TOON sits somewhere between JSON and YAML:
- Less punctuation and quoting than JSON
- More explicit structure than YAML
- Still very easy to parse
- Still clearly structured for machines
That’s the idea, anyway.
—
Why People Think TOON Is Useful
The current interest in TOON is largely driven by AI/LLM workflows.
People are using it because:
- It is easier for humans to read than JSON.
- It is less ambiguous and complex than YAML.
- It maps cleanly to the JSON data model.
- It is relatively easy to parse.
- It works well in prompts and generated output.
In other words, it’s not trying to replace JSON for APIs, and it’s not trying to replace YAML for configuration files. It’s aiming at the space where humans and machines are collaborating on structured data.
You may or may not buy that argument — but it’s an interesting niche.
—
Why I Wrote a Perl Module
I don’t have particularly strong opinions about TOON as a format. It might take off, it might not. We’ve seen plenty of “next big data format” ideas over the years.
But what I do have a strong opinion about is this:
If a data format exists, then Perl should have a CPAN module for it that works the way Perl programmers expect.
Perl already has very good, very consistent interfaces for data serialisation:
- JSON
- YAML
- Storable
- Sereal
They all tend to follow the same pattern, particularly the object-oriented interface:
use JSON;
my $json = JSON->new->pretty->canonical;
my $text = $json->encode($data);
my $data = $json->decode($text);
So I wanted a TOON module that worked the same way.
—
Design Goals
When designing the module, I had a few simple goals.
1. Familiar OO Interface
The primary interface should be object-oriented and feel like JSON.pm:
use TOON;
my $toon = TOON->new
               ->pretty
               ->canonical
               ->indent(2);
my $text = $toon->encode($data);
my $data = $toon->decode($text);
If you already know JSON, you already know how to use TOON.
There are also convenience functions, but the OO interface is the main one.
2. Pure Perl Implementation
Version 0.001 is pure Perl. That means:
- Easy to install
- No compiler required
- Works everywhere Perl works
If TOON becomes popular and performance matters, someone can always write an XS backend later.
3. Clean Separation of Components
Internally, the module is split into:
- Tokenizer – turns text into tokens
- Parser – turns tokens into Perl data structures
- Emitter – turns Perl data structures into TOON text
- Error handling – reports line/column errors cleanly
This makes it easier to test and maintain.
4. Do the Simple Things Well First
Version 0.001 supports:
- Scalars
- Arrayrefs
- Hashrefs
-
undef→ null - Pretty printing
- Canonical key ordering
It does not (yet) try to serialise blessed objects or do anything clever. That can come later if people actually want it.
—
Example Usage (OO Style)
Here’s a simple Perl data structure:
my $data = {
  name => "Arthur Dent",
  age => 42,
  drinks => ["tea", "coffee"],
  alive => 1,
};
Encoding
use TOON;
my $toon = TOON->new->pretty->canonical;
my $text = $toon->encode($data);
print $text;
Decoding
use TOON;
my $toon = TOON->new;
my $data = $toon->decode($text);
print $data->{name};
Convenience Functions
use TOON qw(encode_toon decode_toon);
my $text = encode_toon($data);
my $data = decode_toon($text);
But the OO interface is where most of the flexibility lives.
—
Command Line Tool
There’s also a command-line tool, toon_pp, similar to json_pp:
cat data.toon | toon_pp
Which will pretty-print TOON data.
—
Final Thoughts
I don’t know whether TOON will become widely used. Predicting the success of data formats is a fool’s game. But the cost of supporting it in Perl is low, and the potential usefulness is high enough to make it worth doing.
And fundamentally, this is how CPAN has always worked:
See a problem. Write a module. Upload it. See if anyone else finds it useful.
So now Perl has a TOON module. And if you already know how to use JSON.pm, you already know how to use it.
That was the goal.
The post Writing a TOON Module for Perl first appeared on Perl Hacks.

I shouldn’t speak too soon - this is only the third monthly newsletter. But I’m happy to hit even that small milestone.
So what’s been happening in February?
Perl School Publishing
This is where I should be concentrating my efforts. And I’m certainly doing useful work in this area.
The first month’s royalties for Design Patterns in Modern Perl arrived. It’s not going to change Mohammad’s way of life, but I think he was pleasantly surprised at the amount of money he got.
I spent some time working on getting a dead tree version of Design Patterns ready. It’s not quite there yet, but it’s getting close. And, hopefully, once I’ve solved the problem for one book, I’ll have processes in place to make it easy to do the same for other Perl School books.
The other big project there is, of course, the second edition of Data Munging with Perl. I’m still making progress, but not at the rate I’d like. I’ve set myself a target, but I’m not going to tell you what that is - so you won’t laugh (or shout) at me when it sails past. It doesn’t help that I’ve had an idea that slightly pivots a previous writing project and has really excited me. I’ve told myself I can’t start working on it until Data Munging has been published.
When I first started using the “Perl School” brand (for training in 2012), I registered the .co.uk version of the domain. I mentioned that in a few blog posts at the time. But I soon realised the .com version was also available, so I bought that too. I kept them both for a while (redirecting the .co.uk to the .com), but three or four years ago, I decided to cut back on the domains I owned and let the original (.co.uk) version lapse. Last week, I saw a comment on one of those old blog posts, asking if I had fallen on hard times, because a link to the old domain now displayed a porn site. I guess I should be flattered that a porn gang thought the domain was valuable enough to register and hijack!
Line of Succession
I hadn’t done much work on the Line of Succession site since I redesigned it last year. So it was about time it had a bit of love. So I turned my attention to it for a few days.
Last year, I discovered WikiData, a site that provides machine-readable data about… well, about pretty much everything. I wish I had known about it when I was first filling in the data for Line of Succession six years ago. Back then, I spent many Sundays copying data from Wikipedia into my database. If I had known about WikiData I could have probably automated most of that.
But there’s always more data that can be added. And it’s always a good idea to ensure the data I have is still up to date.
So I’ve written a program that uses WikiData to audit my database. It looks for things like missing death dates and missing children (so I don’t have to spend time poring over the society pages to check for births and deaths). It will even fix many of these problems automatically. It will also help me push my data back in time - as it looks for missing parents and will insert those records based on the information stored in WikiData.
I’ve written a GitHub Actions workflow that runs the audit program every day and produces a report of potential problems. Currently, I don’t let it fix things automatically, but that’s bound to follow as my confidence in the program grows.
I’ve also tried to increase the rate at which I publish articles on the Line of Succession newsletter. If you have any interest in the British royal family, you might like to subscribe to that.
Web servers and directory listings
Back in January, I wrote a blog post about App::HTTPThis, a CPAN module I maintain that runs a simple static web server. I find it invaluable when I’m working on a static website (which is a surprisingly high amount of time).
The blog post led to a slight uptick in interest in the module and I ended up doing a bit more work on it. In particular, I took the code which generates a directory listing and split it out into a separate module (WebServer::DirIndex) in the hope that other people doing similar work could use the same code.
One interesting thing about this project was the way that I wrote almost no code for it. I created issues in the GitHub repo and assigned those issues to GitHub Copilot. A few minutes later, a pull request would show up and I would review it and (usually) merge it without any problems.
I was so impressed by how well this went that I wrote a blog post about it:
Maybe a similar workflow would work for you, too.
Contributing to GitHub Marketplace
I’ve used GitHub since soon after it first appeared. I like to keep up to date with its newest features. I’ve even written a book about GitHub Actions (that probably needs to be updated - I wonder when I’ll have time to do that). But I had never written anything that was available from GitHub Marketplace.
Until yesterday.
Like most good Open Source tools, it does one simple thing. And it scratches a personal itch.
I have a lot of projects on GitHub - I mean hundreds. And I’m a firm believer that a good project should have a website. But when you have hundreds of projects, it’s impossible to maintain that number of websites.
But, many of those projects will already contain a file that could function as a simple, one-page website for the project - the README.md.
I wanted an easy way to take a README.md, convert it to index.html and publish it to GitHub Pages. You can do this with Jekyll, of course, but sometimes, bringing in a whole Static Site Generator ecosystem can feel like overkill.
So, that’s what readme-to-index does. It:
Installs Pandoc in your workflow environment
It uses Pandoc to convert your README.md to index.html
By default, it uses Simple.css to make the page look nice
It publishes that page to GitHub Pages
I wrote a blog post going into more detail - Your README Is Already a Website
KeepAChangeLog on MetaCPAN
I like the idea of using industry standards wherever possible. And I think that sometimes the Perl community prefers its own standards to more widely-recognised ones.
One example is change logs.
There’s a CPAN module called CPAN::Changes that defines a specification for change logs and then parses logs in that format. It’s used on MetaCPAN to present change logs in a very readable fashion.
But there’s an alternative standard called Keep A ChangeLog. And, because that format is widely-used in open source projects, it’s the format I like to use. However, MetaCPAN doesn’t recognise that format, so my change logs get presented in a less satisfactory manner.
Last April, I raised an issue asking for support for the Keep A ChangeLog format. And volunteering myself to implement it. And then promptly forgot about.
I was reminded a few weeks ago, when Olaf Alders posted a comment on that issue, asking if I was still planning to work on it.
That galvanised me into doing something. I’ve now released CPAN::Changes::Parser::KeepAChangeLog, which parses a Keep A ChangeLog-style file and produces a standard parsed change log object. I’m hoping that can be injected into the MetaCPAN page build process to display my change logs in a nice manner. But that’s a project for later this month.
We ❤️ the NHS
At the end of January, I had some routine blood tests, and some of the numbers came back slightly higher than my doctor was happy with. This led to a series of repeated tests, phone calls and a referral to a local hospital for some slightly deeper tests.
I’m sure I’m fine, and this is just my doctor ensuring that no possible avenue is left unexplored. And I think that’s great. I would far rather she order too many tests than too few.
I try to keep politics out of this newsletter, but I want to go on record as saying that the NHS is one of the great things about living in the UK. It’s something I appreciate more and more as I get older.
Anyway, enough sentimentality. That’s about all I achieved in February. Looking back at what I’ve just written, it seems rather more than I thought at the time. I guess that’s a good thing.
How about you? What achievements from February are you particularly proud of?
I’ll be in touch again in about a month.
Dave…
Welcome to 2026. What have you all been working on? Let me give you a bit of an overview of my month.
In-house training
I used to have a nice little sideline in in-house Perl training. But as fewer and fewer companies used Perl, it slowed down and, eventually, died off. For a few years, I assumed that part of my career was behind me.
But it’s had a late surge.
Just before Christmas, I got an email from an old friend from the London Perl Mongers, asking if I could give some Perl training to a few employees at his company. I, of course, agreed. I’ve done two days for them and I’m going back again next week.
All of which has made me think there might be other people out there who could also benefit from this training. In order to tempt those people into contacting me, I’ve put together a page where I’ve started to gather the slides from the large number of training courses I’ve run in the past. It’ll take a while (not least because my filing system has not been great in the past), but it’ll be worth a look, I hope.
If you think this could be useful to you, then please get in touch (just reply to this email).
Perl in TIOBE
Did you know that TIOBE stands for “The Importance of Being Earnest”? I’m not sure what the connection between Wilde’s play and a software popularity index is.
For about twenty years, there has been a lot of commentary in the Perl community over the TIOBE index. Many people have expended a lot of time and energy explaining why the TIOBE index doesn’t measure anything useful. This is because, over that time, has been showing a dramatic fall in interest in Perl.
Those complaints have stopped now.
That’s because, over the last year or so, Perl has been rising up the index again. Which is, to be honest, slightly surprising. But the rise is undeniable. In January 2025, Perl was at #25 in the index. In January 2026, it was at #11.
TIOBE only ever make the current month’s data available, which includes a comparison to the data from a year earlier. And because people often don’t realise that, we’ve had a year of “Perl leaps 20 places!” posts in r/perl. In order to attempt to counter that, I’ve put together a page that contains the data going back as far as I’ve managed to find it (which is, sadly, only to mid-2015). It would be great ot have the data going back further than that - but at least it gives some context to the currently monthly figures.
I still have no idea why Perl is suddenly doing so well, though. If you have any theories, I'd love to hear them.
Line of Succession work
I mentioned in the last newsletter that I’ve been doing some work on Line of Succession. This is all triggered by my desire to move it off my rented VPS and into the cloud. This means I want to make it as slim as possible, so cloud charges don’t cripple me.
One thing I did was to move the database from MariaDB to SQLite. The tables are all pretty small, and a permanent database server is one of the things that can really rack up the cloud costs. I should point out that this only works because the database here is totally read-only. The line of succession only changes three or four times a year and, when it does, I update a local copy of the database and upload that to the production server.
This was great, but I started to notice some outages on the app (thanks to PrettyGoodPing). It turned out that the system was running out of open filehandles. So the quick fix was to increase that to a huge number while I tracked down the real culprit. I soon worked out that I was assuming there was one persistent database connection per process - and that wasn’t the case. This was fine when I was using MariaDB, but for SQLite, each open connection is an open filehandle. Half an hour of investigation showed me where the problem was, and now the system runs forever without running out of filehandles.
Perl Ad Server
I run the Perl Ad Server - which is a simple way for people to add adverts for Perl community announcements to their websites. It’s been running for a while now and I had never really given much thought to the website that tells people what it is and how to use it.
Then Olaf Alders got in touch and asked if I would like to try out a new AI prompt/skill that he had developed (based on a blog post by Anil Dash). The idea is that you craft your text so that people are able to accurately (and accurately!) repeat your messaging, even when you aren’t around.
When looking at a project to try it out on, I thought of the Perl Ad Server. I fired up ChatGPT, gave it Olaf’s prompt and pointed it at the Ad Server’s web page. Within half an hour, I had the copy that you see on the page today. It’s a vast improvement on what was there before.
Dave Knows London
Later this year, it will be 46 years since I moved to London. I came here to go to university and just never left. In that time, I like to think I’ve walked most of the streets - certainly in Zone 1, maybe further out.
I’ve often thought that in an alternative universe, I could be a successful tour guide.
And now, I’ve dipped my toe into testing that theory. I’ve set up a website (using Substack) called Dave Knows London, where I plan to share my knowledge of London over the coming months. I’m also publishing PDFs of self-guided tours through interesting parts of London. The first one (a walk along the river from London Bridge to the Royal Festival Hall) is already available on Gumroad.
I wonder if anyone reading this newsletter was at the first YAPC Europe in London in 2000. As part of the evening entertainment, I took a group of people on a pub crawl along the Thames. That was basically this walk - but in reverse.
Domains & Substacks
I used to be a bit of a domain hoarder. You know, the kind of person who has a great idea for a side-project and buys the domain before writing any code. And then (in at least 50% of cases) never writes the code. Let me know if that sounds at all familiar.
I’ve got better recently, though. Since 2020, I’ve made a determined effort to let a load of domains lapse. I still have too many, but it’s a manageable number. That’s why I wrote the domain management tool that I mentioned in the last newsletter[*].
But I may have replaced that with a new vice - collecting Substacks. And I don’t mean Substack subscriptions (surely, we all do that - let me know if you have one and I’ll subscribe). No, I mean actual Substacks that I own.
In case you want to subscribe to the full set:
One Thing at a Time - this one. You’re probably already subscribed
Line of Succession - posts about the British royal family (and I’m still slightly puzzled how I became an expert on that)
The Horsell Transmissions - my emerging novel, telling the story of The War of the Worlds from the perspective of the Martians
Dave Knows London - as mentioned above. Still getting going
[*] And note that’s living on a subdirectory of an existing domain. In the past, that would have been on its own domain - that’s a sign of me getting better.
An intriguing series of posts
I like to mention at least one project that isn’t mine. And, today, it’s an intriguing series of blog posts from my old friend James Duncan. The point is to introduce his new project Pagelove. He has certainly piqued my curiosity.
The adverts
I’ve talked about my rejuvenated enthusiasm for in-house training. But that’s not the only way I could, perhaps, help you. Take a look at my services page and let me know if there’s anything there that interests you.
That’s all for this time. See you in a month (or so!)
Dave…
(excerpts from a private diary recovered on a cracked iPhone, case stickered with glitter stars and a faded tour laminate)

2 January 2026
I promised myself I’d start writing again.
Not “journalling”, because that sounds like oat milk and linen trousers. Just… writing things down. A place to put the noise.
I’m in a hotel room that smells like new carpet and expensive soap. Somewhere between “the Midwest” and “I can’t remember what state this is because I slept through the drive”. The team is asleep in the other rooms. My stylist left a garment bag on the chair like a person.
I’m supposed to be grateful. I am grateful. I’m also… floating. Like my body belongs to everyone else, and my voice is a thing people rent for two and a half minutes at a time.
Mum called. She said she watched my NYE performance twice and cried both times. I told her it was the wind machine, it makes everyone cry.
She laughed and then asked if I’d voted.
I said, “Mum. I sing.”
“I know,” she said. “But you live here.”
“I live on a tour bus,” I said.
That made her go quiet, like I’d said something sad by accident.
I’m not apolitical. I have feelings. I just don’t know what to do with them. Every time I post about anything, someone tells me I’m brave and someone else tells me I’m a stupid puppet and a third person says I should stick to lip gloss and leaving men.
I don’t want to be the girl who “stays out of politics” because that’s what people say right before they’re shocked the world is on fire.
But I also don’t want to be the girl who becomes a headline because I used the wrong word in the wrong paragraph on the wrong day.
Anyway.
This is my attempt at being real in a place nobody can quote.
If anyone ever reads this, hi. Please don’t.
18 March 2026
Rehearsals for the summer thing have started. The big summer thing.
They keep calling it “the Semiquin”. Like it’s a fun party theme. Like it’s a cocktail.
“Two hundred and fifty years,” my manager said, and he was beaming like he personally invented independence.
There are meetings where men in suits say “historic” fifteen times and never say “people”.
I’m supposed to sing at an official event in DC. Not the main fireworks one — something family-friendly with TV cameras and veterans and a giant stage and flags and a laser show that’s going to spell out USA in the sky like God’s password.
“Legacy moment,” everyone keeps saying. “Iconic.”
I asked if there would be protests.
My publicist smiled in a way that made her teeth look sharp. “There are always protests. It’s fine.”
Then she gave me a list of approved talking points that basically translated to:
I love everyone. I love America. Please buy my merch.
4 July 2026
Today was… a lot.
They drove us in through security like we were going to space. Metal fences, dogs, men with earpieces saying things into their wrists. My outfit was white and sparkling, because of course it was. I looked like a patriotic disco ball.
Backstage there were balloons and catered salads no-one ate. On a monitor I watched a drone shot of the crowd: families, sunburns, people waving flags like they were trying to fan the entire country cool.
Then, on the edge of the frame, something darker. A moving patch. Like a storm.
At first it looked like nothing. Just people gathering. Then the camera zoomed in and I saw signs. I couldn’t read most of them, but I saw one that said NO MORE KINGS and another with a woman’s face printed huge, her mouth taped over.
“Is that about…?” I started.
My manager shook his head hard, like I’d tried to bite him. “Not your lane,” he said. “Eyes on the stage.”
The protest grew while the speeches happened. It wasn’t just a couple of people. It was thousands. You could hear it, this low roar that didn’t match the script. A sound like an ocean deciding it didn’t like the shore.
My slot was after the Governor, after the general, after the kid who won the essay contest about freedom. I watched them all say the same words in different voices.
And then it was me.
The lights hit and the crowd became this bright blur. I walked out, smiled, did the little wave I practised since I was fifteen in my bedroom mirror, and started singing.
The first verse was fine. I could do it on autopilot. I could sing this song in my sleep.
Then, somewhere to my left, the chanting sharpened. It turned into actual words.
I caught fragments between the beat:
…our bodies…
…no rights…
…not safe…
I looked down the front row. There was a little girl on someone’s shoulders, wearing headphones too big for her head. She was grinning like she thought the chanting was part of the show.
Behind her, a woman’s eyes were wet. She wasn’t singing along. She was staring past me at something I couldn’t see.
Then a bottle flew.
Not at me. Across the fence line. It arced through the air like a terrible, lazy bird and hit the ground near the security line. Glass burst into sunlight.
That was the moment everything changed, because the people in black didn’t hesitate. They moved like a machine with one thought.
The chant became a scream.
Someone rushed the fence. Someone else rushed the someone. The sound of the crowd snapped.
In my ear, the director barked, “Keep going! Keep going!”
So I did. I kept singing while the world cracked open at the edges.
The cameras, of course, kept filming.
The song ended. There was applause in the “this is what we do at concerts” way, like muscle memory. The laser show started. The sky turned into a flag. The fireworks went off like it was all normal.
Backstage, my hands were shaking so hard I couldn’t get my in-ear out.
My publicist was already on her phone. “We’re putting out a statement,” she said, voice sugary. “We condemn violence. We support peaceful expression. We’re grateful for the opportunity to celebrate — ”
I interrupted. “People were getting hurt.”
“Yes,” she said, like I was a toddler pointing out the obvious. “That’s why we condemn violence.”
I pulled up the live stream on my phone. In the comments people were yelling at me.
Why didn’t I stop singing?
Why didn’t I say something?
Why did I even go there?
Why did I sing for them?
I sat down on the floor between garment bags and cried into my knees like I was back in school, in the bathroom, hiding from gossip.
For the first time in my life, I understood what it meant to be a symbol.
And I hated it.
6 July 2026
My name trended for two days. That feels normal now, which is insane.
But this was different. It wasn’t “cute dress” or “new album” or “she’s dating who???” It was war.
Half the internet decided I’d performed for fascists. The other half decided I was a patriot princess being bullied by ungrateful traitors. Both halves demanded I speak.
My team wrote me three versions of a statement.
Version A: “love and unity”
Version B: “I support democracy”
Version C: “I stand with women”
Version C had a big red RISKY label on it like it was raw chicken.
I chose C anyway.
I posted it at 11:13pm because I didn’t want to do it in daylight.
It was basically: I saw what happened. I’m scared. I believe people deserve rights and safety and a future. I don’t want violence. I want accountability.
I pressed send and then threw up.
By morning, the message had ten million likes.
And two million threats.
2 September 2026
This is the thing nobody tells you about being famous:
You can’t tell when the air changes until you try to breathe and there’s a hand on your throat.
The shows kept happening. The interviews kept happening. The brand deals kept emailing like the world wasn’t falling apart.
But the vibe — God, I hate that word — shifted.
People at airports started shouting “whore” like it was a hobby.
Someone mailed my record label a dead bird with a note that said SING FOR AMERICA OR SHUT UP.
Security got upgraded. It’s weird to have armed men whose only job is to follow you around while you drink iced coffee.
I kept thinking about that little girl on shoulders in July. Headphones too big. Smile like a sunrise. What does she grow up into?
What do I?
19 November 2027
I haven’t written in a while, which means I’m either happy or scared.
I’m scared.
There’s a new kind of news now: not “thing happened” but “thing might happen, prepare yourself.” Like the country is holding its breath and nobody’s sure how to exhale without breaking something.
The rumours say there’s going to be a big push for “national renewal”. They keep using that phrase. Renewal like a subscription. Renewal like your battery is dying so you replace it.
Mum called again.
She asked if I had cash at home.
I laughed at first, because who uses cash? Then I realised she wasn’t joking.
“Just… keep some,” she said. “And copies of your documents. Okay?”
I said okay.
After the call, I found my passport in a drawer and held it like it was a tiny brick of safety.
3 February 2028
Tonight was the night the lights went out, metaphorically and literally.
It started with alerts: something happened in DC. Something big. There were videos — smoke, sirens, people running.
Then the networks went… strange. Presenters with stiff faces repeating words like “uncertain” and “unconfirmed”. A crawl at the bottom of the screen saying STAY INDOORS like we were all naughty dogs.
My manager called, voice shaking. “Don’t post. Don’t go live. Don’t say anything.”
“People are dying,” I said.
“I know,” he whispered. “That’s why.”
There’s a certain kind of fear that comes from being told to shut up by someone who normally begs you to speak.
I turned on the TV anyway.
A man in uniform appeared behind a podium.
He said “temporary” a lot.
He said “for your safety”.
He said “suspension”.
He said “order”.
He didn’t say when it would end.
12 February 2028
The first thing they took wasn’t the right to vote.
It wasn’t even your phone.
It was your normal.
They told everyone to carry ID at all times. They put up checkpoints “in response to threats”. Streets got blocked. National Guard vehicles became just… scenery. Like buses.
Then the companies started acting strange. Posts got removed. Accounts got flagged. People I know in the industry had their pages disappear overnight, like someone erased them from the world.
I had a meeting with my label on Zoom and the legal guy said, very calmly, “We should be careful about the language in your upcoming lyrics.”
“Language,” I repeated. Like the word women was a bomb.
1 March 2028
The money thing happened today.
It didn’t feel dramatic. No soldiers smashed down my door. No one snatched my credit cards.
My assistant texted me: Hey, quick one, your card declined at Erewhon. Might be a bank glitch?
I laughed. “Of course it did,” I said aloud, alone in my kitchen. “Of course.”
Then I opened my banking app.
And it asked me to log in again, which it never does.
When I finally got in, my balances looked… wrong. Not empty, exactly. Just… inaccessible. Like the numbers were there but behind glass.
A pop-up message appeared:
ACCOUNT ACCESS UPDATED DUE TO NATIONAL FINANCIAL SECURITY MEASURES.
There was a “learn more” link that didn’t load.
I rang my business manager. Straight to voicemail.
I rang my mother. No answer.
I rang the bank. A recording told me they were experiencing “high call volumes due to the situation.”
The situation.
Later, my manager called back, and for the first time in his life he sounded small.
“They’ve… changed things,” he said.
“What things?”
He didn’t want to say it, like saying it would make it true.
“Women’s accounts,” he whispered. “They’re… transferring authority to heads of households.”
I stared at my phone.
“I’m the head of my household,” I said, and it came out like a joke.
“I know,” he said. “But… they don’t.”
Something inside me went cold.
It wasn’t just the money. It was the lesson.
Everything you earned can be rewritten.
Everything you are can be reassigned.
I opened my wardrobe and saw my tour costumes hanging like ghosts.
Sparkle, sequins, short skirts, bare shoulders, all the things people called “empowering” right up until they decided it was “sinful”.
I suddenly wanted to burn it all.
Instead I sat on the floor and held my knees and tried not to scream.
6 March 2028
My label sent me a “pause notice.”
My tour was cancelled “for safety”.
My brand deals disappeared like they’d never existed.
My social accounts became… quiet. My posts still showed to me, but the likes stopped. Comments slowed. My reach died in a way that felt artificial, like someone had turned down my volume.
My manager told me to stop leaving the house.
My security team said they could no longer carry firearms in certain zones without new licences.
“We can still protect you,” the lead guy said.
He didn’t look convinced.
I tried to buy groceries with cash. The cashier looked at me too long, then glanced at the man behind me in line, like she was checking if it was safe to be kind.
When I walked back to my car, someone hissed, “Jezebel,” under their breath.
I didn’t know what it meant then.
I looked it up later and wished I hadn’t.
21 April 2028
They came for the artists next.
Not with arrests. Not with headlines.
With rules.
A new “decency code” for broadcast.
A list of banned topics. Banned imagery. Banned “influences”.
A radio station accidentally played one of my older songs and then apologised for it on air like they’d run a slur.
I watched a news segment about “cultural repair” where a man smiled and said, “We’re simply restoring values.”
Restoring.
Like we were a broken chair.
Like my life was a mistake they could sand down.
That night I called my mother and she finally answered.
Her voice sounded like she’d aged ten years.
“Are you safe?” she asked.
“I’m scared,” I said, which was as close to truth as I could get.
“Listen,” she said. “We need to leave.”
“We can’t,” I said. “We’re — ”
“I don’t care what we are,” she snapped, and it shocked me silent. My mother never snapped. “We are not staying. Do you understand?”
“How?” I whispered.
She took a breath.
“Canada,” she said. “I have a friend. There’s a way.”
2 May 2028
Planning an escape feels like being in a spy film, except there’s no cool music and you can’t trust anyone and your hands won’t stop sweating.
We couldn’t use my usual travel people. Too many names in too many systems. Too many eyes.
My mother’s friend knew someone who’d helped a family cross last month. “Not legal,” she said. “But safer than staying.”
I stared at my passport again, like it might grow wings.
“Won’t they stop us at the border?” I asked.
“They stop some people,” she said. “Not all.”
There was a pause, and then, gently:
“Your face helps. For now.”
I hated that. I hated that my fame — this thing that had always felt like a cage — might become a key.
Or a target.
We decided to go in the dark, not because it’s romantic, but because darkness makes you less visible.
My mother told me to pack light.
I packed like I was going to die.
I took:
- a hoodie
- jeans
- trainers
- my passport
- my mum’s old gold necklace
- a cheap burner phone
- the little notebook I wrote songs in when I was sixteen
And then I stood in my closet, looking at the sparkly dresses, and I realised I didn’t want any of them.
They belonged to a world that didn’t exist anymore.
9 May 2028
We drove for hours. No music. No talking.
My mother held the wheel like it had offended her.
We avoided main roads. We avoided cities. We avoided anything that looked like authority.
Every time we passed a sign with a flag on it, my stomach clenched.
At one checkpoint, a man in uniform leaned in and looked at my face like he was deciding what I was worth.
I kept my eyes down, hair pulled forward, hoodie up.
My mother said, calm as a saint, “We’re visiting family.”
He looked at our documents for too long.
Then he handed them back and waved us through.
When we were out of sight, my mother exhaled so hard the car shook.
“Don’t cry,” I whispered.
“I’m not crying,” she said.
She was crying.
10 May 2028
The crossing wasn’t a border crossing.
It was woods.
It was mud and branches and cold air that tasted like wet metal.
It was following a stranger with a torch covered in red tape so the light wouldn’t carry far.
The stranger didn’t talk. They just moved.
My trainers sank into the earth. My legs burned. My breath came out loud and stupid.
At one point, we heard an engine and dropped down behind a fallen tree like we were in a war, which maybe we were.
I thought about July 2026 and the flags and the fireworks and me singing about love while people screamed.
I thought: I should have stopped.
And then I thought: Stopping wouldn’t have stopped this.
The stranger held up a hand.
We froze.
In the distance there was a line of lights, like a town trying to look friendly.
“Almost,” the stranger whispered for the first time.
My mother grabbed my hand. Her fingers were ice.
“Keep going,” she mouthed.
We kept going.
Then we crossed an invisible line and nothing changed except the stranger turned and said, softly, “You’re in Canada.”
I didn’t believe them.
But then I saw a small sign nailed to a post, half hidden by leaves, and it had a maple leaf on it.
And my knees gave out.
I sat in the mud and laughed, which turned into sobbing, which turned into laughter again.
My mother knelt beside me and pressed her forehead to mine.
“Baby,” she whispered, voice breaking. “Baby, we made it.”
For the first time in months, my lungs filled like they were allowed to.
12 May 2028
We’re in a small flat above a bakery. The air smells like bread and cinnamon, which feels like a miracle.
I keep waiting for someone to knock on the door and say this was all a mistake and we have to go back.
No one has knocked.
A woman from some organisation came today. She brought forms. Warm socks. A phone charger.
She spoke gently, like she knew my voice from the radio but didn’t want to make me a thing.
“Do you need medical care?” she asked my mother.
“Do you need legal help?” she asked me.
I almost laughed at that. Legal. Like the law still knows my name.
I said, “I don’t have any money.”
She nodded, not shocked, not judging. “We can help with that.”
Then she looked at me, really looked, and said quietly, “You’re safe here.”
Safe.
The word felt unreal in my mouth.
After she left, I sat by the window and watched people walk past like it was just another day. Someone carried a coffee. Someone carried flowers. A teenager laughed into their phone like laughing was normal.
I tried to imagine my old life — stages, lights, stadium screams — and it felt like remembering a dream you had when you were a child.
I opened my notes app and scrolled through my unfinished songs.
There was one line I’d written in July 2026, right after the protest. I’d forgotten it was there.
Freedom is a costume until someone tears it.
I don’t know if I’ll ever sing again.
Part of me wants to disappear forever, become nobody, walk around in a hoodie and buy bread and never be looked at like a symbol.
Part of me wants to scream so loud the whole world has to listen.
Maybe those two things can be the same.
Maybe the girl who only wanted to write love songs has to learn a new kind of music.
Tonight my mother is asleep on the sofa, exhausted in a way I’ve never seen. Her face in sleep is softer, like she’s put down a weight she’s been carrying since I was born.
I tucked a blanket over her like she used to do for me.
Outside, it’s snowing.
It’s May. It shouldn’t be snowing.
But it is.
The world is wrong in so many ways.
And still.
I am here.
I am breathing.
I am not owned.
I am not quiet.
Not forever.
13 May 2028
I walked to the bakery downstairs and bought two cinnamon buns with the last of the cash we had.
The man behind the counter smiled at me like I was just a girl buying breakfast.
I didn’t know I needed that more than anything.
When I got back upstairs, my mother was awake. She sat up, hair wild, and for a second she looked like herself again.
“What’s that?” she asked.
“Freedom,” I said, and held up the bag.
She laughed, the real laugh, the one that used to fill our kitchen back home.
We ate warm bread with sugar on our fingers, and for a moment the world didn’t feel like an ending.
It felt like a beginning.
I don’t know what happens next.
But I know this:
If they ever build their cages all the way to here,
I will sing.
And I will not keep going when the screaming starts.
14 May 2028
There’s a radio in the kitchen.
It’s old. The kind with a dial you turn and you can hear the station arrive through static, like it’s travelling to you across water.
I didn’t notice it yesterday. I didn’t want to notice anything that wasn’t cinnamon and safety and my mother breathing evenly in the next room.
This morning I was making tea — real tea, with a kettle that clicks off like punctuation — when the bakery downstairs started playing something through the floorboards. A thump of bass, a bright little song, the kind that tries to keep you smiling while you’re carrying flour sacks.
Normal.
Then the music cut out.
Not like the playlist ended. Like someone reached into the world and switched it off. Something told me this was important, so I turned on the radio.
A voice came through, fuzzy at first. I thought it was an advert.
My first stupid thought was: Is this about me?
Then the signal cleared.
“This is the North American Continuity Broadcast,” the voice said. Calm. Male. Midwestern, maybe. The kind of accent you’re supposed to trust. “Service interruption is expected in all former United States territories as the Republic of Gilead continues stabilisation measures. Citizens are reminded that unauthorised travel is treason.”
I froze with the mug in my hand.
The voice kept going, smooth as oil.
“Curfew remains in effect from nineteen hundred hours. Women are reminded of their household duties and may not conduct financial transactions without registered guardianship. Reports of dissident activity will be rewarded. Blessed are the obedient.”
Blessed are the —
I almost dropped the mug.
I thought about the word blessed the way it used to show up in speeches and captions and award acceptance speeches. Blessed to be here. Blessed to do what I love. Blessed to have fans like you.
Now it sounded like a lock clicking shut.
The radio crackled, then another voice joined, brighter, almost cheerful, as if this were the weather.
“Please stand by for the Hymn of Gratitude,” it said.
And then music started. Not pop. Not even the kind of hymn my grandmother used to hum. This was… a march wearing church clothes. A melody designed for people to sing in unison.
I turned the dial. Static. Another station. More static. Then the same voice again, on a different frequency, like it was flooding the air.
The bakery music never came back.
I sat down on the kitchen floor, my back against the cupboard, and tried to breathe normally.
I’m safe.
I’m safe.
I’m safe.
My phone was on the counter. I picked it up without thinking, thumb sliding to the news apps like muscle memory.
Everything loaded… slowly. And then not at all.
When it finally refreshed, the headlines were a blur of words I’d been avoiding:
NEW ORDER
CONTINUITY GOVERNMENT
REFUGEE SURGE
BORDER INCIDENT
“ILLEGAL FEMINIST NETWORK” DISRUPTED
I scrolled until my hand started shaking.
Then I went to my own name.
Not the one on my passport.
The other one.
The one people chant. The one printed in glitter on T-shirts. The one that used to feel like armour.
On social media, my last post was still there. The one from 2026. The one that had started all of this for me — choosing the risky statement like I was choosing a filter.
But now the likes were frozen at a number that didn’t look real anymore.
The comments were different. Not hate. Not love.
Just emptiness.
And then — new comments, all the same, posted by accounts with flags and no faces:
TRAITOR
SILENCE
UNWOMAN
RETURN AND REPENT
My stomach rolled.
I stared at the screen for a long time, like if I stared hard enough it would become the old internet again. The stupid internet. The harmless internet. The place where people argued about my hair and not my right to exist.
My mother came in, rubbing sleep from her eyes.
“What’s wrong?” she asked, instantly alert. Mothers can hear panic even when it’s quiet.
I pointed at the radio.
She listened for less than ten seconds before her face changed. Not surprise. Not disbelief.
Just grim recognition. Like she’d known this day would come and had been walking towards it her whole life.
She turned it off.
The silence afterwards felt loud.
“We’re safe,” she said, and her voice sounded like she was trying to convince both of us. “We’re here. That’s what matters.”
I nodded.
But my hands were still shaking.
Because it wasn’t just out there. It had followed us into the air.
It existed now, broadcastable. Official.
Gilead wasn’t a rumour anymore. It had a schedule.
I looked down at my phone.
At my profile.
At my name.
It suddenly felt like a flare in the dark. A bright little beacon saying: Here I am. Here I am. Come get me.
I opened settings.
Account.
Name.
The cursor blinked at me like a heartbeat.
I deleted the stage name letter by letter.
It was weirdly hard. Like peeling off your own skin.
When it was gone, I didn’t replace it with my real name. Not yet. I left it blank.
Just empty space.
A ghost account.
No icon. No bio. No proof.
I went through every platform I could still access and did the same. Unlink. Disconnect. Remove. Hide.
It wasn’t dramatic. It didn’t feel heroic.
It felt like turning out the lights in a house you’re leaving forever.
When I finished, I sat there for a moment, staring at the blank profile page.
I thought I would feel smaller.
I thought I would feel relieved.
Instead I felt… strange.
Light.
Like for the first time in years there wasn’t a version of me being owned by everyone else.
My mother watched me from the doorway. She didn’t ask why. She just nodded, like she understood.
“What now?” I whispered.
She came over, crouched beside me, and put her hand over mine.
“Now,” she said softly, “you live.”
Outside, the street was calm. A dog barked once. Somewhere a car door shut. Canada continued being itself, stubbornly ordinary.
I looked at my empty profile.
No name.
No glitter.
No applause.
Just a human being, breathing.
And somewhere, far away, a new country was telling women what they were allowed to do with their hands.
I closed the app.
I didn’t delete the diary.
Not yet.
Because maybe one day, when it’s safe again — when the air belongs to everyone and not just the loudest men — someone will need proof that this happened.
That it didn’t arrive all at once with uniforms and slogans.
That it crept in through “temporary”.
Through “for your safety”.
Through a song you kept singing because someone in your ear told you to keep going.
I used to write love songs.
Maybe I still will.
But not the kind that ask for permission.
(excerpts from a private diary recovered on a cracked iPhone, case stickered with glitter stars and a faded tour laminate)
2 January 2026
I promised myself I’d start writing again.
Not “journalling”, because that sounds like oat milk and linen trousers. Just… writing things down. A place to put the noise.
I’m in a hotel room that smells like new carpet and expensive soap. Somewhere between “the Midwest” and “I can’t remember what state this is because I slept through the drive”. The team is asleep in the other rooms. My stylist left a garment bag on the chair like a person.
I’m supposed to be grateful. I am grateful. I’m also… floating. Like my body belongs to everyone else, and my voice is a thing people rent for two and a half minutes at a time.
Mum called. She said she watched my NYE performance twice and cried both times. I told her it was the wind machine, it makes everyone cry.
She laughed and then asked if I’d voted.
I said, “Mum. I sing.”
“I know,” she said. “But you live here.”
“I live on a tour bus,” I said.
That made her go quiet, like I’d said something sad by accident.
I’m not apolitical. I have feelings. I just don’t know what to do with them. Every time I post about anything, someone tells me I’m brave and someone else tells me I’m a stupid puppet and a third person says I should stick to lip gloss and leaving men.
I don’t want to be the girl who “stays out of politics” because that’s what people say right before they’re shocked the world is on fire.
But I also don’t want to be the girl who becomes a headline because I used the wrong word in the wrong paragraph on the wrong day.
Anyway.
This is my attempt at being real in a place nobody can quote.
If anyone ever reads this, hi. Please don’t.
18 March 2026
Rehearsals for the summer thing have started. The big summer thing.
They keep calling it “the Semiquin”. Like it’s a fun party theme. Like it’s a cocktail.
“Two hundred and fifty years,” my manager said, and he was beaming like he personally invented independence.
There are meetings where men in suits say “historic” fifteen times and never say “people”.
I’m supposed to sing at an official event in DC. Not the main fireworks one—something family-friendly with TV cameras and veterans and a giant stage and flags and a laser show that’s going to spell out USA in the sky like God’s password.
“Legacy moment,” everyone keeps saying. “Iconic.”
I asked if there would be protests.
My publicist smiled in a way that made her teeth look sharp. “There are always protests. It’s fine.”
Then she gave me a list of approved talking points that basically translated to:
I love everyone. I love America. Please buy my merch.
4 July 2026
Today was… a lot.
They drove us in through security like we were going to space. Metal fences, dogs, men with earpieces saying things into their wrists. My outfit was white and sparkling, because of course it was. I looked like a patriotic disco ball.
Backstage there were balloons and catered salads no-one ate. On a monitor I watched a drone shot of the crowd: families, sunburns, people waving flags like they were trying to fan the entire country cool.
Then, on the edge of the frame, something darker. A moving patch. Like a storm.
At first it looked like nothing. Just people gathering. Then the camera zoomed in and I saw signs. I couldn’t read most of them, but I saw one that said NO MORE KINGS and another with a woman’s face printed huge, her mouth taped over.
“Is that about…?” I started.
My manager shook his head hard, like I’d tried to bite him. “Not your lane,” he said. “Eyes on the stage.”
The protest grew while the speeches happened. It wasn’t just a couple of people. It was thousands. You could hear it, this low roar that didn’t match the script. A sound like an ocean deciding it didn’t like the shore.
My slot was after the Governor, after the general, after the kid who won the essay contest about freedom. I watched them all say the same words in different voices.
And then it was me.
The lights hit and the crowd became this bright blur. I walked out, smiled, did the little wave I practised since I was fifteen in my bedroom mirror, and started singing.
The first verse was fine. I could do it on autopilot. I could sing this song in my sleep.
Then, somewhere to my left, the chanting sharpened. It turned into actual words.
I caught fragments between the beat:
…our bodies…
…no rights…
…not safe…
I looked down the front row. There was a little girl on someone’s shoulders, wearing headphones too big for her head. She was grinning like she thought the chanting was part of the show.
Behind her, a woman’s eyes were wet. She wasn’t singing along. She was staring past me at something I couldn’t see.
Then a bottle flew.
Not at me. Across the fence line. It arced through the air like a terrible, lazy bird and hit the ground near the security line. Glass burst into sunlight.
That was the moment everything changed, because the people in black didn’t hesitate. They moved like a machine with one thought.
The chant became a scream.
Someone rushed the fence. Someone else rushed the someone. The sound of the crowd snapped.
In my ear, the director barked, “Keep going! Keep going!”
So I did. I kept singing while the world cracked open at the edges.
The cameras, of course, kept filming.
The song ended. There was applause in the “this is what we do at concerts” way, like muscle memory. The laser show started. The sky turned into a flag. The fireworks went off like it was all normal.
Backstage, my hands were shaking so hard I couldn’t get my in-ear out.
My publicist was already on her phone. “We’re putting out a statement,” she said, voice sugary. “We condemn violence. We support peaceful expression. We’re grateful for the opportunity to celebrate—”
I interrupted. “People were getting hurt.”
“Yes,” she said, like I was a toddler pointing out the obvious. “That’s why we condemn violence.”
I pulled up the live stream on my phone. In the comments people were yelling at me.
Why didn’t I stop singing?
Why didn’t I say something?
Why did I even go there?
Why did I sing for them?
I sat down on the floor between garment bags and cried into my knees like I was back in school, in the bathroom, hiding from gossip.
For the first time in my life, I understood what it meant to be a symbol.
And I hated it.
6 July 2026
My name trended for two days. That feels normal now, which is insane.
But this was different. It wasn’t “cute dress” or “new album” or “she’s dating who???” It was war.
Half the internet decided I’d performed for fascists. The other half decided I was a patriot princess being bullied by ungrateful traitors. Both halves demanded I speak.
My team wrote me three versions of a statement.
Version A: “love and unity”
Version B: “I support democracy”
Version C: “I stand with women”
Version C had a big red RISKY label on it like it was raw chicken.
I chose C anyway.
I posted it at 11:13pm because I didn’t want to do it in daylight.
It was basically: I saw what happened. I’m scared. I believe people deserve rights and safety and a future. I don’t want violence. I want accountability.
I pressed send and then threw up.
By morning, the message had ten million likes.
And two million threats.
2 September 2026
This is the thing nobody tells you about being famous:
You can’t tell when the air changes until you try to breathe and there’s a hand on your throat.
The shows kept happening. The interviews kept happening. The brand deals kept emailing like the world wasn’t falling apart.
But the vibe—God, I hate that word—shifted.
People at airports started shouting “whore” like it was a hobby.
Someone mailed my record label a dead bird with a note that said SING FOR AMERICA OR SHUT UP.
Security got upgraded. It’s weird to have armed men whose only job is to follow you around while you drink iced coffee.
I kept thinking about that little girl on shoulders in July. Headphones too big. Smile like a sunrise. What does she grow up into?
What do I?
19 November 2027
I haven’t written in a while, which means I’m either happy or scared.
I’m scared.
There’s a new kind of news now: not “thing happened” but “thing might happen, prepare yourself.” Like the country is holding its breath and nobody’s sure how to exhale without breaking something.
The rumours say there’s going to be a big push for “national renewal”. They keep using that phrase. Renewal like a subscription. Renewal like your battery is dying so you replace it.
Mum called again.
She asked if I had cash at home.
I laughed at first, because who uses cash? Then I realised she wasn’t joking.
“Just… keep some,” she said. “And copies of your documents. Okay?”
I said okay.
After the call, I found my passport in a drawer and held it like it was a tiny brick of safety.
3 February 2028
Tonight was the night the lights went out, metaphorically and literally.
It started with alerts: something happened in DC. Something big. There were videos—smoke, sirens, people running.
Then the networks went… strange. Presenters with stiff faces repeating words like “uncertain” and “unconfirmed”. A crawl at the bottom of the screen saying STAY INDOORS like we were all naughty dogs.
My manager called, voice shaking. “Don’t post. Don’t go live. Don’t say anything.”
“People are dying,” I said.
“I know,” he whispered. “That’s why.”
There’s a certain kind of fear that comes from being told to shut up by someone who normally begs you to speak.
I turned on the TV anyway.
A man in uniform appeared behind a podium.
He said “temporary” a lot.
He said “for your safety”.
He said “suspension”.
He said “order”.
He didn’t say when it would end.
12 February 2028
The first thing they took wasn’t the right to vote.
It wasn’t even your phone.
It was your normal.
They told everyone to carry ID at all times. They put up checkpoints “in response to threats”. Streets got blocked. National Guard vehicles became just… scenery. Like buses.
Then the companies started acting strange. Posts got removed. Accounts got flagged. People I know in the industry had their pages disappear overnight, like someone erased them from the world.
I had a meeting with my label on Zoom and the legal guy said, very calmly, “We should be careful about the language in your upcoming lyrics.”
“Language,” I repeated. Like the word women was a bomb.
1 March 2028
The money thing happened today.
It didn’t feel dramatic. No soldiers smashed down my door. No one snatched my credit cards.
My assistant texted me: Hey, quick one, your card declined at Erewhon. Might be a bank glitch?
I laughed. “Of course it did,” I said aloud, alone in my kitchen. “Of course.”
Then I opened my banking app.
And it asked me to log in again, which it never does.
When I finally got in, my balances looked… wrong. Not empty, exactly. Just… inaccessible. Like the numbers were there but behind glass.
A pop-up message appeared:
ACCOUNT ACCESS UPDATED DUE TO NATIONAL FINANCIAL SECURITY MEASURES.
There was a “learn more” link that didn’t load.
I rang my business manager. Straight to voicemail.
I rang my mother. No answer.
I rang the bank. A recording told me they were experiencing “high call volumes due to the situation.”
The situation.
Later, my manager called back, and for the first time in his life he sounded small.
“They’ve… changed things,” he said.
“What things?”
He didn’t want to say it, like saying it would make it true.
“Women’s accounts,” he whispered. “They’re… transferring authority to heads of households.”
I stared at my phone.
“I’m the head of my household,” I said, and it came out like a joke.
“I know,” he said. “But… they don’t.”
Something inside me went cold.
It wasn’t just the money. It was the lesson.
Everything you earned can be rewritten.
Everything you are can be reassigned.
I opened my wardrobe and saw my tour costumes hanging like ghosts.
Sparkle, sequins, short skirts, bare shoulders, all the things people called “empowering” right up until they decided it was “sinful”.
I suddenly wanted to burn it all.
Instead I sat on the floor and held my knees and tried not to scream.
6 March 2028
My label sent me a “pause notice.”
My tour was cancelled “for safety”.
My brand deals disappeared like they’d never existed.
My social accounts became… quiet. My posts still showed to me, but the likes stopped. Comments slowed. My reach died in a way that felt artificial, like someone had turned down my volume.
My manager told me to stop leaving the house.
My security team said they could no longer carry firearms in certain zones without new licences.
“We can still protect you,” the lead guy said.
He didn’t look convinced.
I tried to buy groceries with cash. The cashier looked at me too long, then glanced at the man behind me in line, like she was checking if it was safe to be kind.
When I walked back to my car, someone hissed, “Jezebel,” under their breath.
I didn’t know what it meant then.
I looked it up later and wished I hadn’t.
21 April 2028
They came for the artists next.
Not with arrests. Not with headlines.
With rules.
A new “decency code” for broadcast.
A list of banned topics. Banned imagery. Banned “influences”.
A radio station accidentally played one of my older songs and then apologised for it on air like they’d run a slur.
I watched a news segment about “cultural repair” where a man smiled and said, “We’re simply restoring values.”
Restoring.
Like we were a broken chair.
Like my life was a mistake they could sand down.
That night I called my mother and she finally answered.
Her voice sounded like she’d aged ten years.
“Are you safe?” she asked.
“I’m scared,” I said, which was as close to truth as I could get.
“Listen,” she said. “We need to leave.”
“We can’t,” I said. “We’re—”
“I don’t care what we are,” she snapped, and it shocked me silent. My mother never snapped. “We are not staying. Do you understand?”
“How?” I whispered.
She took a breath.
“Canada,” she said. “I have a friend. There’s a way.”
2 May 2028
Planning an escape feels like being in a spy film, except there’s no cool music and you can’t trust anyone and your hands won’t stop sweating.
We couldn’t use my usual travel people. Too many names in too many systems. Too many eyes.
My mother’s friend knew someone who’d helped a family cross last month. “Not legal,” she said. “But safer than staying.”
I stared at my passport again, like it might grow wings.
“Won’t they stop us at the border?” I asked.
“They stop some people,” she said. “Not all.”
There was a pause, and then, gently:
“Your face helps. For now.”
I hated that. I hated that my fame—this thing that had always felt like a cage—might become a key.
Or a target.
We decided to go in the dark, not because it’s romantic, but because darkness makes you less visible.
My mother told me to pack light.
I packed like I was going to die.
I took:
-
a hoodie
-
jeans
-
trainers
-
my passport
-
my mum’s old gold necklace
-
a cheap burner phone
-
the little notebook I wrote songs in when I was sixteen
And then I stood in my closet, looking at the sparkly dresses, and I realised I didn’t want any of them.
They belonged to a world that didn’t exist anymore.
9 May 2028
We drove for hours. No music. No talking.
My mother held the wheel like it had offended her.
We avoided main roads. We avoided cities. We avoided anything that looked like authority.
Every time we passed a sign with a flag on it, my stomach clenched.
At one checkpoint, a man in uniform leaned in and looked at my face like he was deciding what I was worth.
I kept my eyes down, hair pulled forward, hoodie up.
My mother said, calm as a saint, “We’re visiting family.”
He looked at our documents for too long.
Then he handed them back and waved us through.
When we were out of sight, my mother exhaled so hard the car shook.
“Don’t cry,” I whispered.
“I’m not crying,” she said.
She was crying.
10 May 2028
The crossing wasn’t a border crossing.
It was woods.
It was mud and branches and cold air that tasted like wet metal.
It was following a stranger with a torch covered in red tape so the light wouldn’t carry far.
The stranger didn’t talk. They just moved.
My trainers sank into the earth. My legs burned. My breath came out loud and stupid.
At one point, we heard an engine and dropped down behind a fallen tree like we were in a war, which maybe we were.
I thought about July 2026 and the flags and the fireworks and me singing about love while people screamed.
I thought: I should have stopped.
And then I thought: Stopping wouldn’t have stopped this.
The stranger held up a hand.
We froze.
In the distance there was a line of lights, like a town trying to look friendly.
“Almost,” the stranger whispered for the first time.
My mother grabbed my hand. Her fingers were ice.
“Keep going,” she mouthed.
We kept going.
Then we crossed an invisible line and nothing changed except the stranger turned and said, softly, “You’re in Canada.”
I didn’t believe them.
But then I saw a small sign nailed to a post, half hidden by leaves, and it had a maple leaf on it.
And my knees gave out.
I sat in the mud and laughed, which turned into sobbing, which turned into laughter again.
My mother knelt beside me and pressed her forehead to mine.
“Baby,” she whispered, voice breaking. “Baby, we made it.”
For the first time in months, my lungs filled like they were allowed to.
12 May 2028
We’re in a small flat above a bakery. The air smells like bread and cinnamon, which feels like a miracle.
I keep waiting for someone to knock on the door and say this was all a mistake and we have to go back.
No one has knocked.
A woman from some organisation came today. She brought forms. Warm socks. A phone charger.
She spoke gently, like she knew my voice from the radio but didn’t want to make me a thing.
“Do you need medical care?” she asked my mother.
“Do you need legal help?” she asked me.
I almost laughed at that. Legal. Like the law still knows my name.
I said, “I don’t have any money.”
She nodded, not shocked, not judging. “We can help with that.”
Then she looked at me, really looked, and said quietly, “You’re safe here.”
Safe.
The word felt unreal in my mouth.
After she left, I sat by the window and watched people walk past like it was just another day. Someone carried a coffee. Someone carried flowers. A teenager laughed into their phone like laughing was normal.
I tried to imagine my old life—stages, lights, stadium screams—and it felt like remembering a dream you had when you were a child.
I opened my notes app and scrolled through my unfinished songs.
There was one line I’d written in July 2026, right after the protest. I’d forgotten it was there.
Freedom is a costume until someone tears it.
I don’t know if I’ll ever sing again.
Part of me wants to disappear forever, become nobody, walk around in a hoodie and buy bread and never be looked at like a symbol.
Part of me wants to scream so loud the whole world has to listen.
Maybe those two things can be the same.
Maybe the girl who only wanted to write love songs has to learn a new kind of music.
Tonight my mother is asleep on the sofa, exhausted in a way I’ve never seen. Her face in sleep is softer, like she’s put down a weight she’s been carrying since I was born.
I tucked a blanket over her like she used to do for me.
Outside, it’s snowing.
It’s May. It shouldn’t be snowing.
But it is.
The world is wrong in so many ways.
And still.
I am here.
I am breathing.
I am not owned.
I am not quiet.
Not forever.
13 May 2028
I walked to the bakery downstairs and bought two cinnamon buns with the last of the cash we had.
The man behind the counter smiled at me like I was just a girl buying breakfast.
I didn’t know I needed that more than anything.
When I got back upstairs, my mother was awake. She sat up, hair wild, and for a second she looked like herself again.
“What’s that?” she asked.
“Freedom,” I said, and held up the bag.
She laughed, the real laugh, the one that used to fill our kitchen back home.
We ate warm bread with sugar on our fingers, and for a moment the world didn’t feel like an ending.
It felt like a beginning.
I don’t know what happens next.
But I know this:
If they ever build their cages all the way to here,
I will sing.
And I will not keep going when the screaming starts.
14 May 2028
There’s a radio in the kitchen.
It’s old. The kind with a dial you turn and you can hear the station arrive through static, like it’s travelling to you across water.
I didn’t notice it yesterday. I didn’t want to notice anything that wasn’t cinnamon and safety and my mother breathing evenly in the next room.
This morning I was making tea—real tea, with a kettle that clicks off like punctuation—when the bakery downstairs started playing something through the floorboards. A thump of bass, a bright little song, the kind that tries to keep you smiling while you’re carrying flour sacks.
Normal.
Then the music cut out.
Not like the playlist ended. Like someone reached into the world and switched it off. Something told me this was important, so I turned on the radio.
A voice came through, fuzzy at first. I thought it was an advert.
My first stupid thought was: Is this about me?
Then the signal cleared.
“This is the North American Continuity Broadcast,” the voice said. Calm. Male. Midwestern, maybe. The kind of accent you’re supposed to trust. “Service interruption is expected in all former United States territories as the Republic of Gilead continues stabilisation measures. Citizens are reminded that unauthorised travel is treason.”
I froze with the mug in my hand.
The voice kept going, smooth as oil.
“Curfew remains in effect from nineteen hundred hours. Women are reminded of their household duties and may not conduct financial transactions without registered guardianship. Reports of dissident activity will be rewarded. Blessed are the obedient.”
Blessed are the—
I almost dropped the mug.
I thought about the word blessed the way it used to show up in speeches and captions and award acceptance speeches. Blessed to be here. Blessed to do what I love. Blessed to have fans like you.
Now it sounded like a lock clicking shut.
The radio crackled, then another voice joined, brighter, almost cheerful, as if this were the weather.
“Please stand by for the Hymn of Gratitude,” it said.
And then music started. Not pop. Not even the kind of hymn my grandmother used to hum. This was… a march wearing church clothes. A melody designed for people to sing in unison.
I turned the dial. Static. Another station. More static. Then the same voice again, on a different frequency, like it was flooding the air.
The bakery music never came back.
I sat down on the kitchen floor, my back against the cupboard, and tried to breathe normally.
I’m safe.
I’m safe.
I’m safe.
My phone was on the counter. I picked it up without thinking, thumb sliding to the news apps like muscle memory.
Everything loaded… slowly. And then not at all.
When it finally refreshed, the headlines were a blur of words I’d been avoiding:
NEW ORDER
CONTINUITY GOVERNMENT
REFUGEE SURGE
BORDER INCIDENT
“ILLEGAL FEMINIST NETWORK” DISRUPTED
I scrolled until my hand started shaking.
Then I went to my own name.
Not the one on my passport.
The other one.
The one people chant. The one printed in glitter on T-shirts. The one that used to feel like armour.
On social media, my last post was still there. The one from 2026. The one that had started all of this for me—choosing the risky statement like I was choosing a filter.
But now the likes were frozen at a number that didn’t look real anymore.
The comments were different. Not hate. Not love.
Just emptiness.
And then—new comments, all the same, posted by accounts with flags and no faces:
TRAITOR
SILENCE
UNWOMAN
RETURN AND REPENT
My stomach rolled.
I stared at the screen for a long time, like if I stared hard enough it would become the old internet again. The stupid internet. The harmless internet. The place where people argued about my hair and not my right to exist.
My mother came in, rubbing sleep from her eyes.
“What’s wrong?” she asked, instantly alert. Mothers can hear panic even when it’s quiet.
I pointed at the radio.
She listened for less than ten seconds before her face changed. Not surprise. Not disbelief.
Just grim recognition. Like she’d known this day would come and had been walking towards it her whole life.
She turned it off.
The silence afterwards felt loud.
“We’re safe,” she said, and her voice sounded like she was trying to convince both of us. “We’re here. That’s what matters.”
I nodded.
But my hands were still shaking.
Because it wasn’t just out there. It had followed us into the air.
It existed now, broadcastable. Official.
Gilead wasn’t a rumour anymore. It had a schedule.
I looked down at my phone.
At my profile.
At my name.
It suddenly felt like a flare in the dark. A bright little beacon saying: Here I am. Here I am. Come get me.
I opened settings.
Account.
Name.
The cursor blinked at me like a heartbeat.
I deleted the stage name letter by letter.
It was weirdly hard. Like peeling off your own skin.
When it was gone, I didn’t replace it with my real name. Not yet. I left it blank.
Just empty space.
A ghost account.
No icon. No bio. No proof.
I went through every platform I could still access and did the same. Unlink. Disconnect. Remove. Hide.
It wasn’t dramatic. It didn’t feel heroic.
It felt like turning out the lights in a house you’re leaving forever.
When I finished, I sat there for a moment, staring at the blank profile page.
I thought I would feel smaller.
I thought I would feel relieved.
Instead I felt… strange.
Light.
Like for the first time in years there wasn’t a version of me being owned by everyone else.
My mother watched me from the doorway. She didn’t ask why. She just nodded, like she understood.
“What now?” I whispered.
She came over, crouched beside me, and put her hand over mine.
“Now,” she said softly, “you live.”
Outside, the street was calm. A dog barked once. Somewhere a car door shut. Canada continued being itself, stubbornly ordinary.
I looked at my empty profile.
No name.
No glitter.
No applause.
Just a human being, breathing.
And somewhere, far away, a new country was telling women what they were allowed to do with their hands.
I closed the app.
I didn’t delete the diary.
Not yet.
Because maybe one day, when it’s safe again—when the air belongs to everyone and not just the loudest men—someone will need proof that this happened.
That it didn’t arrive all at once with uniforms and slogans.
That it crept in through “temporary”.
Through “for your safety”.
Through a song you kept singing because someone in your ear told you to keep going.
I used to write love songs.
Maybe I still will.
But not the kind that ask for permission.
The post Notes App, Locked appeared first on Davblog.
[The amount of time between newsletters continues to amuse and embarrass me in equal measures. I knew I had a draft newsletter that I wanted to finish and send out before the end of the year. I was surprised to find the draft dated from the middle of September!]
The title of this newsletter is supposed to remind me that it’s easier to make progress on a project if you only work on one thing at a time. The contents of this edition will be an object lesson in how bad I am at sticking to that.
Data Munging with Perl (2ed)
I am still making progress on this. But I’m embarrassed when I think of the talk I gave about it at the last London Perl Workshop, where I suggested it might be available at around Christmas. Luckily, I didn’t say which Christmas.
I have made progress on it though. In particular:
Working on the chapter that used to be called “Hierarchical Data”. It used to cover HTML and XML. The new version will cut down on the XML content and replace it with coverage of JSON and YAML. I’ll publish a blog post soon that contains an extract from the new version of this chapter.
I got a few reports from LeanPub that the “work in progress” version isn’t working very well for some people. I dug into that and it turns out that the EPUB document that I saved from Google Docs isn’t a particularly standards-compliant EPUB. I’ve been working on a new production pipeline where I download a DOCX version and convert that to EPUB using Pandoc. That seems to be working better.
And let me briefly remind you of the existence of the work-in-progress version. You can buy that now from LeanPub and you’ll get access to all updates - including the finished version when it arrives. That’s very useful for me, as I get to iron out little problems like the one I described above before I publish the final version.
Design Patterns in Modern Perl

I did publish a book, though. My good friend, Mohammad Sajid Anwar, approached me in the autumn and asked if I would be interested in publishing his book, Design Patterns in Modern Perl. If you know Mohammad’s work from Perl Weekly or The Weekly Challenge, then you’ll understand why I leapt at the chance.
We managed to get the book published on both LeanPub and Amazon just in time for Mohammad to announce it at the end of his talk at the London Perl Workshop. In working on turning his Markdown into an ebook, I took the opportunity to update my rather dated publication pipeline, and I wrote a blog post about that - Behind the Scenes at Perl School Publishing.
Mohammad tells me his next book is almost ready (and he has another in progress behind that). I suspect we’ll be renaming Perl School to “Anwar Books” before the end of 2026.
Improving websites
If you’ve followed my work for a while, then you’ll know that I run a lot of websites. At some point, they were each going to be the big, successful project that would make me ridiculous amounts of money and stop me from needing to work for a living. Of course, it never quite worked out like that.
Part of the problem (or, at least, as far as I can see) is my limitations as a web designer. I was delighted ten years ago when I discovered Bootstrap and realised my websites didn’t need to look quite as bad as they originally did. But, eventually, I began to realise that while my sites no longer made me want to scratch my eyes out, their design still left a lot to be desired.
Luckily, ChatGPT is pretty good at website design. So, together, we started a project to improve the look of many of my websites. Let me show you an example.
Read A Booker
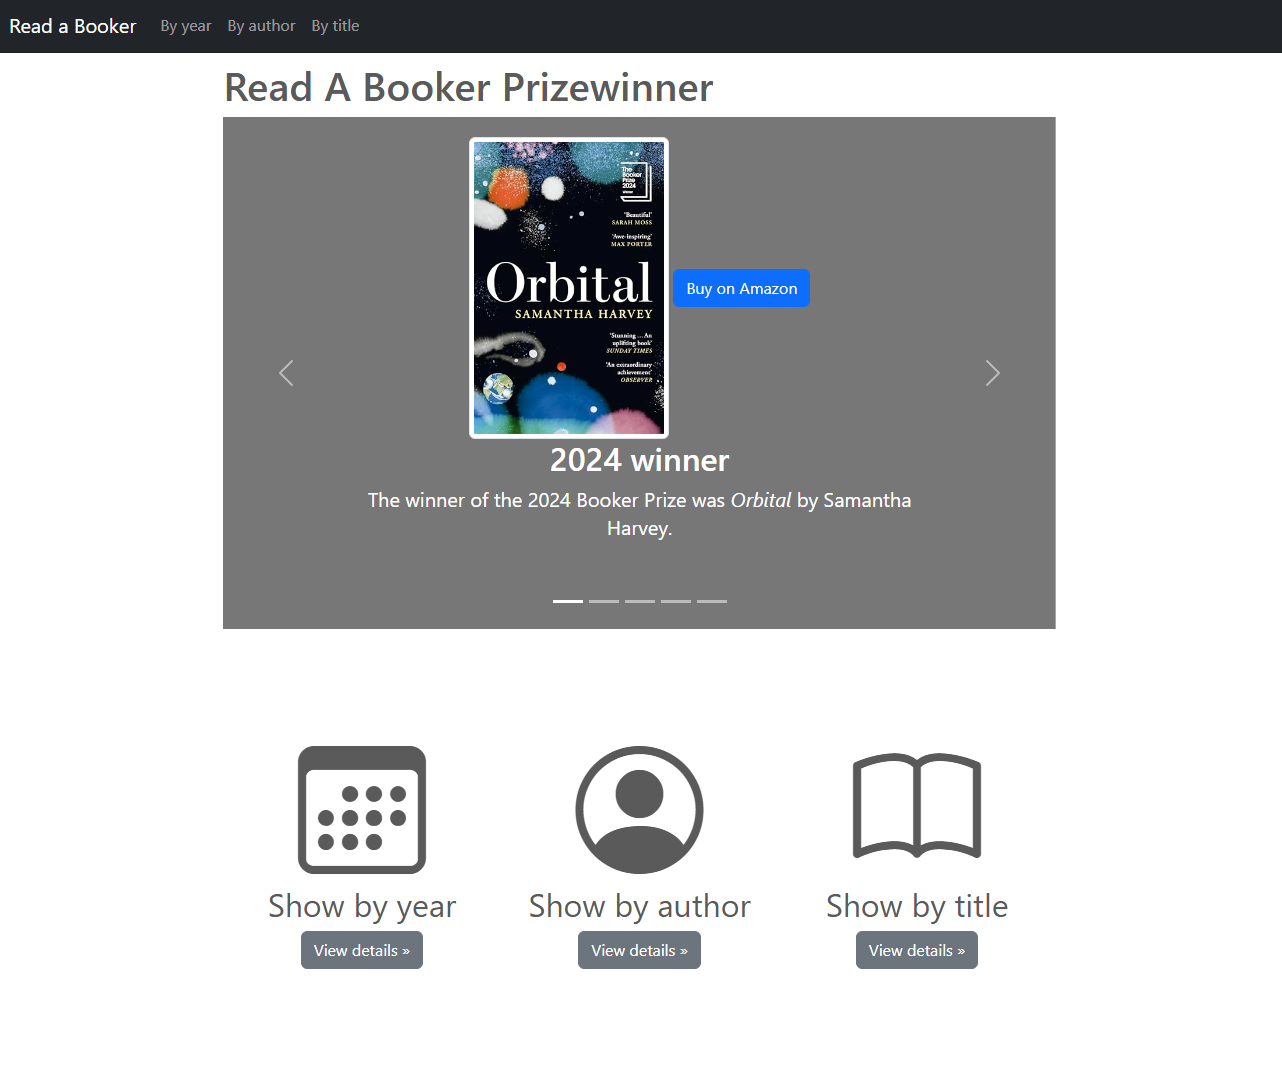
This is how Read A Booker looked a few months ago. It’s a site that lists all of the shortlisted titles for the Booker Prize over the years. Of course, it’s just a way to encourage people to buy the books using my Amazon Associates tag. But it doesn’t really work when the site looks as uninteresting as that.
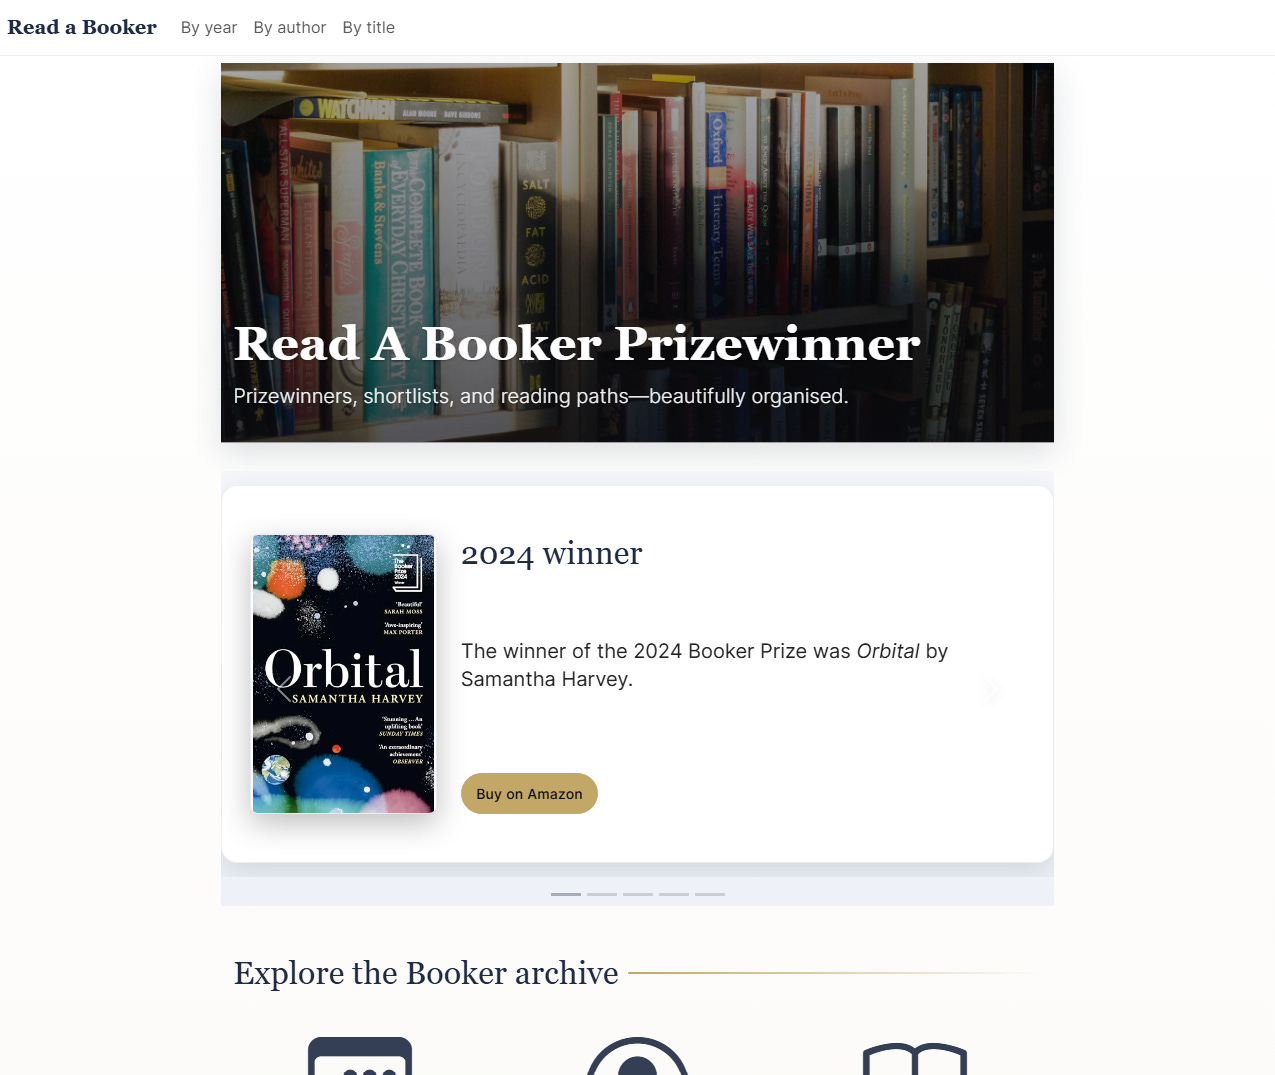
And here’s what it looks like today. Nothing has really changed in the structure of the site, but it just looks that little more enticing. It looks like a “real” website (whatever that means). The other pages all have similar improvements.
Oh, and as part of that project, ChatGPT also helped me write a little Javascript library that adjusts Amazon links and buttons so they automatically go to a visitor’s nearest Amazon site.
Line of Succession
ChatGPT has also helped me make some improvements to the Line of Succession website. This is a site that started as an intellectual puzzle and has grown into my most successful website. It’s a site that allows you to pick a date in the last 200 years and will show you the line of succession to the British throne on that date. It’s pretty niche, but it gets a reasonable amount of traffic each month. The British royal family are obviously still of great interest to a large number of people.
Over the last few months, my work on this site has been in three main areas:
The site has been given a lick of paint. It’s still Bootstrap underneath, but it now looks far more professional
I’ve done some work on the underlying data. Obviously, I know from the news when someone near the top of the list is born or dies. But it would be easy to miss changes further down the line. With help from ChatGPT, I’ve developed some code that queries WikiData and looks for births, deaths and other changes that aren’t already in my database. Later on, I think I can reuse a lot of that code to push my data further back in time
The site is driven by a Dancer2 app that queries an SQLite database and builds the line of succession for a given date. This isn’t particularly efficient and I’ve started redesigning it so the line of succession is precomputed and stored in the database. This will make the site much quicker. This work is ongoing
Moving to the cloud
I still run a lot of my web apps on a VPS. This makes me feel like a dinosaur. So I’ve been moving some of those apps into the cloud. I wrote a blog post about my experiences.
And then, because some people aren’t starting with nice, PSGI-compliant apps, I wrote another blog post explaining how you could also do that with crufty old CGI programs.
Some silly toys
I’ve written before about how AI-assisted programming means a lot of little projects I wouldn’t previously have had time for are getting ticked off. Another version of that is fast becoming a good way to get bugs fixed in my software:
Raise an issue in the GitHub repo
Assign the issue to Co-Pilot
Wait 20-30 minutes for the pull request to arrive
And most of the time, I’m finding that those PRs are of very high quality. Any problems can often be traced to deficiencies in my specification :-)
Here are a couple of toys that I’ve recently written that someone else might find useful:
Dave’s Dry January Tracker - an older project, but it’s had a revamp for 2026
MyDomains - I’m getting over my domain buying habit, honestly! But this helps me track the ones I still have
Feeding my soul
But I can’t work all the time. I need to soak in a bit of culture too - whether that’s consuming or creating. And I have plans to do more of both next year.
Consuming
Film - for some reason I’ve seen about half as many films in 2025 as I did in 2024. I just got out of the habit. It’s a habit I plan to resurrect in 2026. Feel free to follow me on Letterboxd.
Books - I used to be a voracious reader, but I’ve barely finished a book since the pandemic in 2020. You can follow my attempts to read more on Goodreads.
Creating
I’ve written a couple of short stories that I’ve published on Medium.
I’m experimenting with a long-form piece of fiction based on The War of the Worlds.
I’m no musician. But I’m enjoying the possibilities that AI music creation is bringing me. My main project is an artist called Oneirina (that’s her at the top of this newsletter). She’s on Spotify, too. I don’t pretend it’s deep or meaningful, but I think it’s fun.
Anyway, that’s a wrap on 2025 (especially for those of you who are in Australia or New Zealand), I think. I’ll see you in 2026.
Happy New Year,
Dave…

author: Simon Hopkinson
name: David
average rating: 4.20
book published: 1997
rating: 0
read at:
date added: 2025/09/17
shelves: currently-reading
review:

When I started to think about a second edition of Data Munging With Perl, I thought it would be almost trivial. The plan was to go through the text and
Update the Perl syntax to a more modern version of Perl
Update the CPAN modules used
And that was about it.
But when I started looking through the first edition, I realised there was a big chunk of work missing from this plan
Ensure the book reflects current ideas and best practices in the industry
It’s that extra step that is taking the time. I was writing the first edition 25 years ago. That’s a long time. It’s a long time in any industry - it’s several generations in our industry. Think about the way you were working in 2000. Think about the day-to-day tasks you were taking on. Think about the way you organised your day (the first books on Extreme Programming were published in 2000; the Agile Manifesto was written in 2001; Scrum first appeared at about the same time).
The first edition contains the sentence “Databases are becoming almost as ubiquitous as data files”. Imagine saying that with a straight face today. There is one paragraph on Unicode. There’s nothing about YAML or JSON (because those formats both appeared in the years following publication).
When I was writing the slides for my talk, Still Munging Data With Perl, I planned to add a slide about “things we hadn’t heard of in 2000”. It ended up being four slides - and that was just scratching the surface. Not everything in those lists needs to be mentioned in the book - but a lot of it does.
When working on the book recently, I was reminded of how much one particular section of the industry has changed.
The problem of screen-scraping
The first edition has a chapter on parsing HTML. Of course it does - that was cutting edge at the time. At the end of the chapter, there’s an extended example on screen scraping. It grabs the Yahoo! weather forecast for London and extracts a few pieces of data.
I was thinking ahead when I wrote it. There’s a footnote that says:
You should, of course, bear in mind that web pages change very frequently. By the time you read this, Yahoo! may well have changed the design of this page which will render this program useless.
But I had no idea how true that would be. When I revisited it, the changes were far larger than the me of 2000 could have dreamed of.
The page had moved. So the program would have failed at the first hurdle.
The HTML had changed. So even when I updated the URL, the program still failed.
And. most annoyingly, the new HTML didn’t include the data that I wanted to extract. To be clear - the data I wanted was displayed on the page - it just wasn’t included in the HTML.
Oh, I know what you’re thinking. The page is using Javascript to request the data and insert it into the page. That’s what I assumed too. And that’s almost certainly the case. But after an afternoon with the Chrome Development Tools open, I could not find the request that pulled the required data into the page. It’s obviously there somewhere, but I was defeated.
I’ll rewrite that example to use an API to get weather data.
But it was interesting to see how much harder screen scraping has become. I don’t know whether this was an intentional move by Yahoo! or if it’s just a side effect of their move to different technologies for serving this page. Whichever it is, it’s certainly something worth pointing out in that chapter.
Other writing
I seem to have written quite a lot of things that aren’t at all related to the book since my last newsletter. I wonder if that’s some kind of displacement therapy :-)
I’m sure that part of it is down to how much more productive I am now I have AI to help with my projects.
Cleaner web feed aggregation with App::FeedDeduplicator explains a problem I have because I’m syndicating a lot of my blog posts to multiple sites (and talks about my solution).
Reformatting images with App::BlurFill introduces a new CPAN module I wrote to make my life as a publisher easier (but it has plenty of other applications too).
Turning AI into a Developer Superpower: The PERL5LIB Auto-Setter - another project that I’d been putting off because it just seemed a bit too complicated. But ChatGPT soon came up with a solution.
Deploying Dancer Apps – The Next Generation - last year, I wrote a couple of blog posts about how I deployed Dancer apps on my server. This takes it a step further and integrates them with systemd.
Generating Content with ChatGPT - I asked ChatGPT to generate a lot of content for one of my websites. The skeleton of the code I used might be useful for other people.
A Slice of Perl - explaining the idea of slices in Perl. Some people don’t seem to realise they exist, but they’re a really powerful piece of Perl syntax.
Stop using your system Perl - this was controversial. I should probably revisit this and talk about some of the counterarguments I’ve seen.
perlweekly2pod - someone wondered if we could turn the Perl Weekly newsletter into a podcast. This was my proof of concept.
Modern CSS Daily - using ChatGPT to fill in gaps in my CSS knowledge.
Other people’s writing
Pete thinks he can help people sort out their AI-generated start-up code. I think he might be onto something!
The Substack conversation
Like most people, when I started this Substack I had an idea that I might be able to monetise it at some point. I’m not talking about forcing people to pay for it, but maybe add a paid tier on top of this sporadic free one. Obviously, I’d need to get more organised and promise more regular updates - and that’s something for the future.
But over the last few months, I’ve been pleasantly surprised to receive email from Substack saying that two readers have “pre-pledged” for my newsletter. That is, they’ve told Substack that they would be happy to pay for my content. That’s a nice feeling.
To be clear, I’m not talking about adding a paid tier just yet. But I might do that in the future. So, just to gauge interest, I’m going to drop a “pledge your support” button in this email. Don’t feel you have to press it.
That’s all for today. I’m going to get back to working on the book. I’ll write again soon.
Dave…

author: Daniel McClellan
name: David
average rating: 4.34
book published: 2025
rating: 0
read at:
date added: 2025/05/06
shelves: currently-reading
review:
A month after the last newsletter - maybe I’m starting to hit a rhythm. Or maybe it’s just a fluke. Only time will tell.
Still Munging Data With Perl
As I mentioned in a brief update last month, I gave a talk to the Toronto Perl Mongers about Data Munging With Perl. I didn’t go to Toronto - I talked to them (and people all across the world) over Zoom. And that was a slightly strange experience. I hadn’t realised just how much I like the interaction of a live presentation. At the very least, it’s good to know whether or not your jokes are landing!
But I got through it, and people have said they found it interesting. I talked about how the first edition of the book came about and explained why I thought the time was right for a second edition. I gave a brief overview of the kinds of changes that I’m making for the second edition. I finished by announcing that a “work in progress” version of the second edition is available from LeanPub (and that was a surprisingly good idea, judging by the number of people who have bought it!) We finished the evening with a few questions and answers.
You can order the book from LeanPub. And the slides, video and a summary of the talk are all available from my talks site (an occasional project where I’m building an archive of all of the talks I’ve given over the last 25 years).
Still writing Data Munging With Perl
Of course, I still have to finish the second edition. And, having found myself without a regular client a few weeks ago, I’ve been spending most of my time on that. It’s been an interesting journey - seeing just how much has changed over the last quarter of a century. There have been changes in core Perl syntax, changes in recommended CPAN module and changes in the wider industry (for example, 25 years ago, no-one had heard of YAML or JSON).
I’m still unable to give a date for the publication of the final version. But I can feel it getting closer. I think that the next time I write one of these newsletters, I’ll include an extract from one of the chapters that has a large number of changes.
Other writing
I’ve been doing other things as well. In the last newsletter, I wrote about how I had built a website in a day with help from ChatGPT. The following week, I went a bit further and built another website - and this time ChatGPT didn’t just help me create the site, but it also updates the site daily with no input at all from me.
The site is at cool-stuff.co.uk, and I blogged about the project at Finding cool stuff with ChatGPT. My blog post was picked up by the people at dev.to for their Top 7 Featured DEV Posts of the Week feature. Which was nice :-)
I said that ChatGPT was updating the site without any input from me. Well, originally, that wasn’t strictly true. Although ChatGPT seemed to understand the assignment (finding an interesting website to share every day), it seemed to delight in finding every possible loophole in the description of the data format I wanted to get back. This meant that on most days, my code was unable to parse the response successfully and I had a large number of failed updates. It felt more than a little like a story about a genie who gives you three wishes but then does everything in their power to undermine those wishes.
Eventually, I discovered that you can give ChatGPT a JSON Schema definition and it will always create a response that matches that definition (see Structured Outputs). Since I implemented that, I’ve had no problem. You might be interested in how I did that in my Perl program.
Other people’s writing
Paul Cochrane has been writing an interesting series of posts about creating a new map for Mohammad Anwar’s Map::Tube framework. But in the process, he seems to have written a very useful guide on how to write a new CPAN module using modern tools and a test-driven approach. Two articles have been published so far, but he’s promising a total of five.
Building
Map::Tube::<*>maps, a HOWTO: first stepsBuilding
Map::Tube::<*>maps, a HOWTO: extending the network
A spaceship has landed on Earth
Occasionally, when I’m giving a talk I’ll wear a favourite t-shirt that has a picture of a space shuttle on it, along with the text “A spaceship has landed on Earth, it came from Rockwell”. Whenever I wear it, I can guarantee that at least a couple of people will comment on it.
The t-shirt is based on an advert from the first issue of a magazine called OMNI, which was published in 1978. Because of the interest people show in the t-shirt, I’ve put up a website at itcamefromrockwell.com. The site includes a link to a blog post that goes into more detail about the advert, and also a link to a RedBubble shop where you can buy various items using the design.
If you’re at all interested in the history of spaceflight, then you might find the site interesting.
Hope you found something of interest in today’s newsletter. I’ll be back in a week or two with an update on the book.
Cheers,
Dave…

author: Michael Ruhlman
name: David
average rating: 4.06
book published: 2009
rating: 0
read at:
date added: 2023/02/06
shelves: currently-reading
review:


author: J.J. Abrams
name: David
average rating: 3.86
book published: 2013
rating: 0
read at:
date added: 2022/01/16
shelves: currently-reading
review:

author: Beth Buelow
name: David
average rating: 3.31
book published: 2015
rating: 0
read at:
date added: 2020/01/27
shelves: currently-reading
review: